|

General Dynamics F-16 XL
Monogram
|
 |
Stated scale: |
1/72 |
 
|
Actual scale: |
1/72 |


|
Overall length: |
|
Material(s): |
styrene |
Number of parts: |
30; 29 gray, 1 clear dark smoke
|
Stand included? |
no? |
Decals included? |
yes |
My Source: |
local shop |
Cost (w/o s&h): |
? |

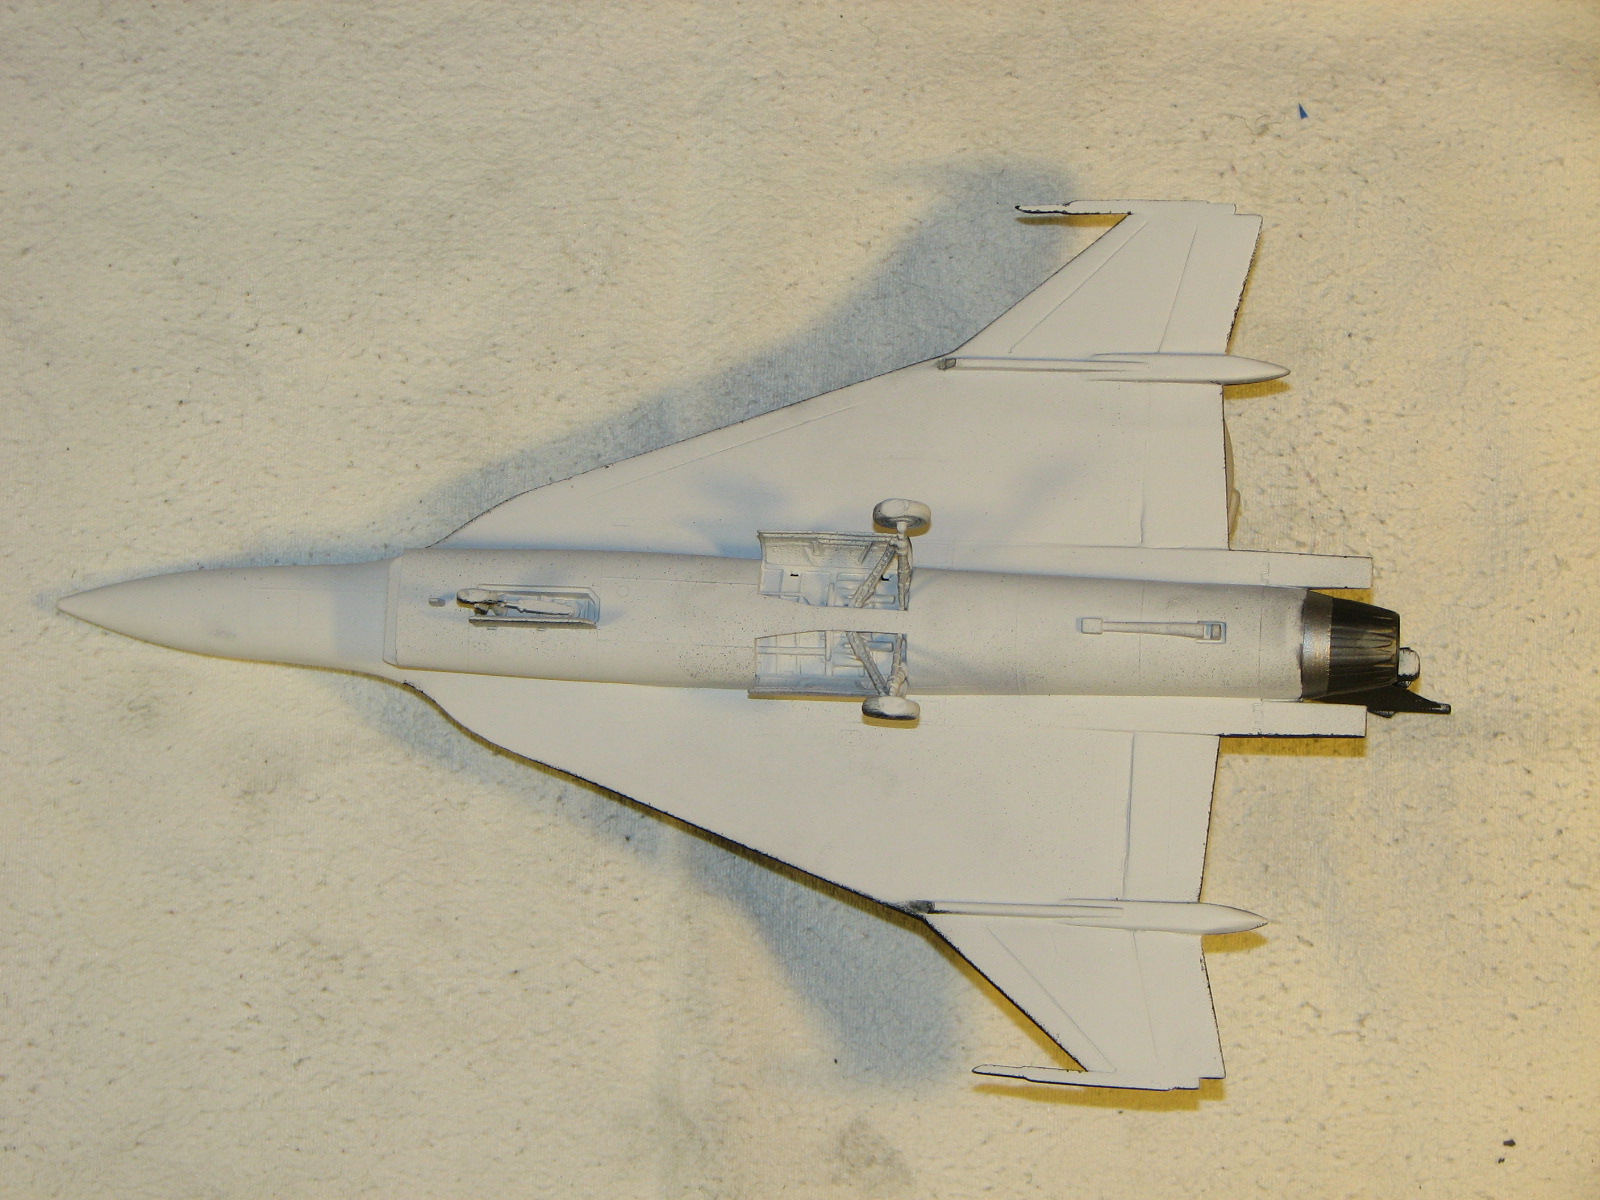
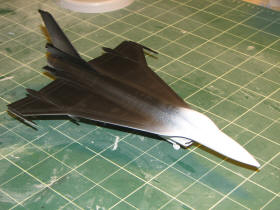
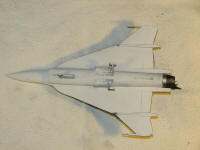
3/31/2010 - I got this kit when it first came out back in
the 80s, put it together, gave it the "by the box" red, white, and blue paint
scheme and called it good. Well, recently I wanted to re-do this, and do a
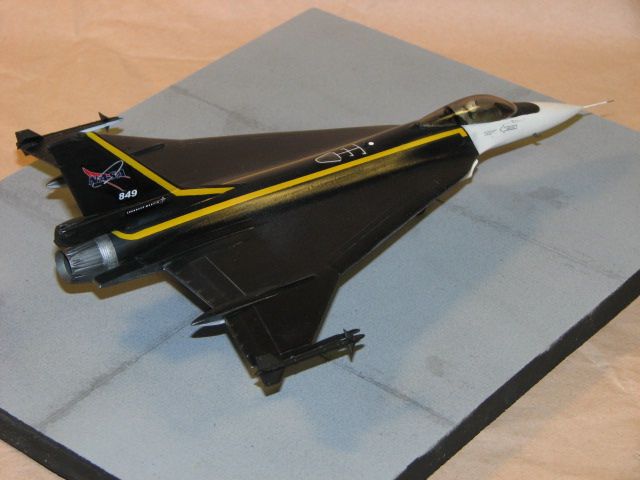
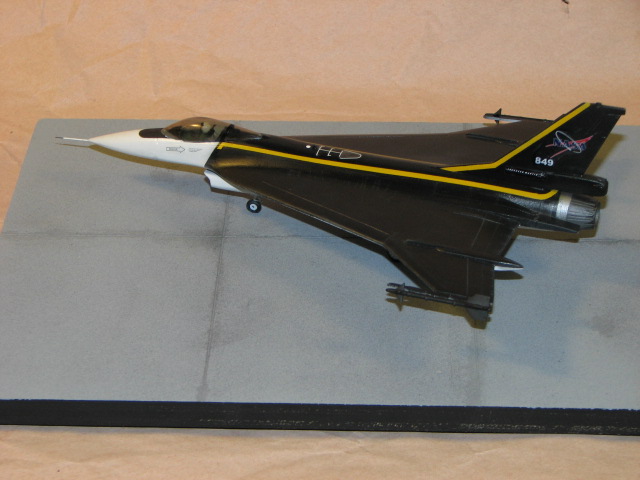
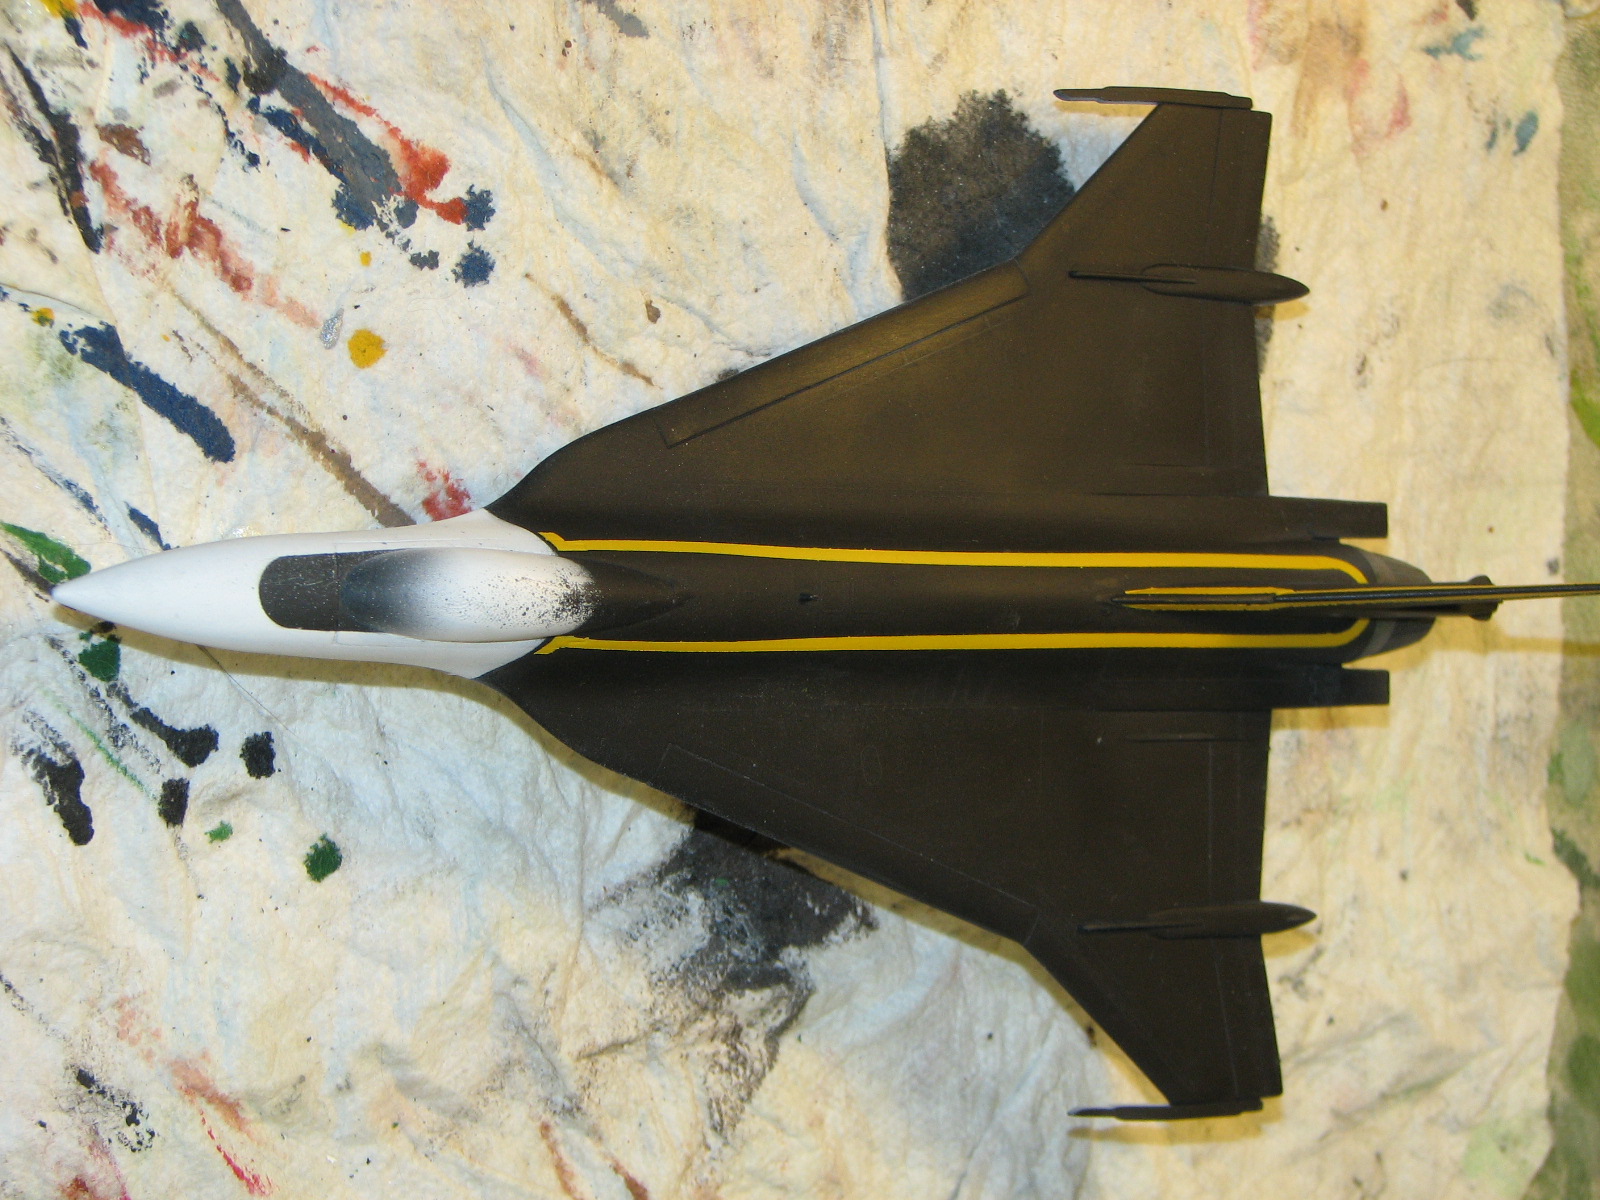
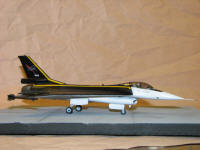
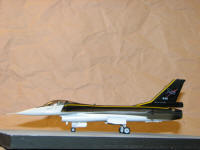
better job of it. So, for something a bit unusual, I'm re-painting this in a
scheme for one of the NASA research F-16XLs at
Dryden
circa 1990s.
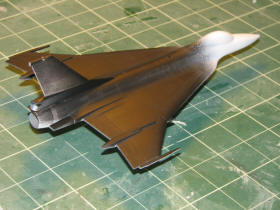

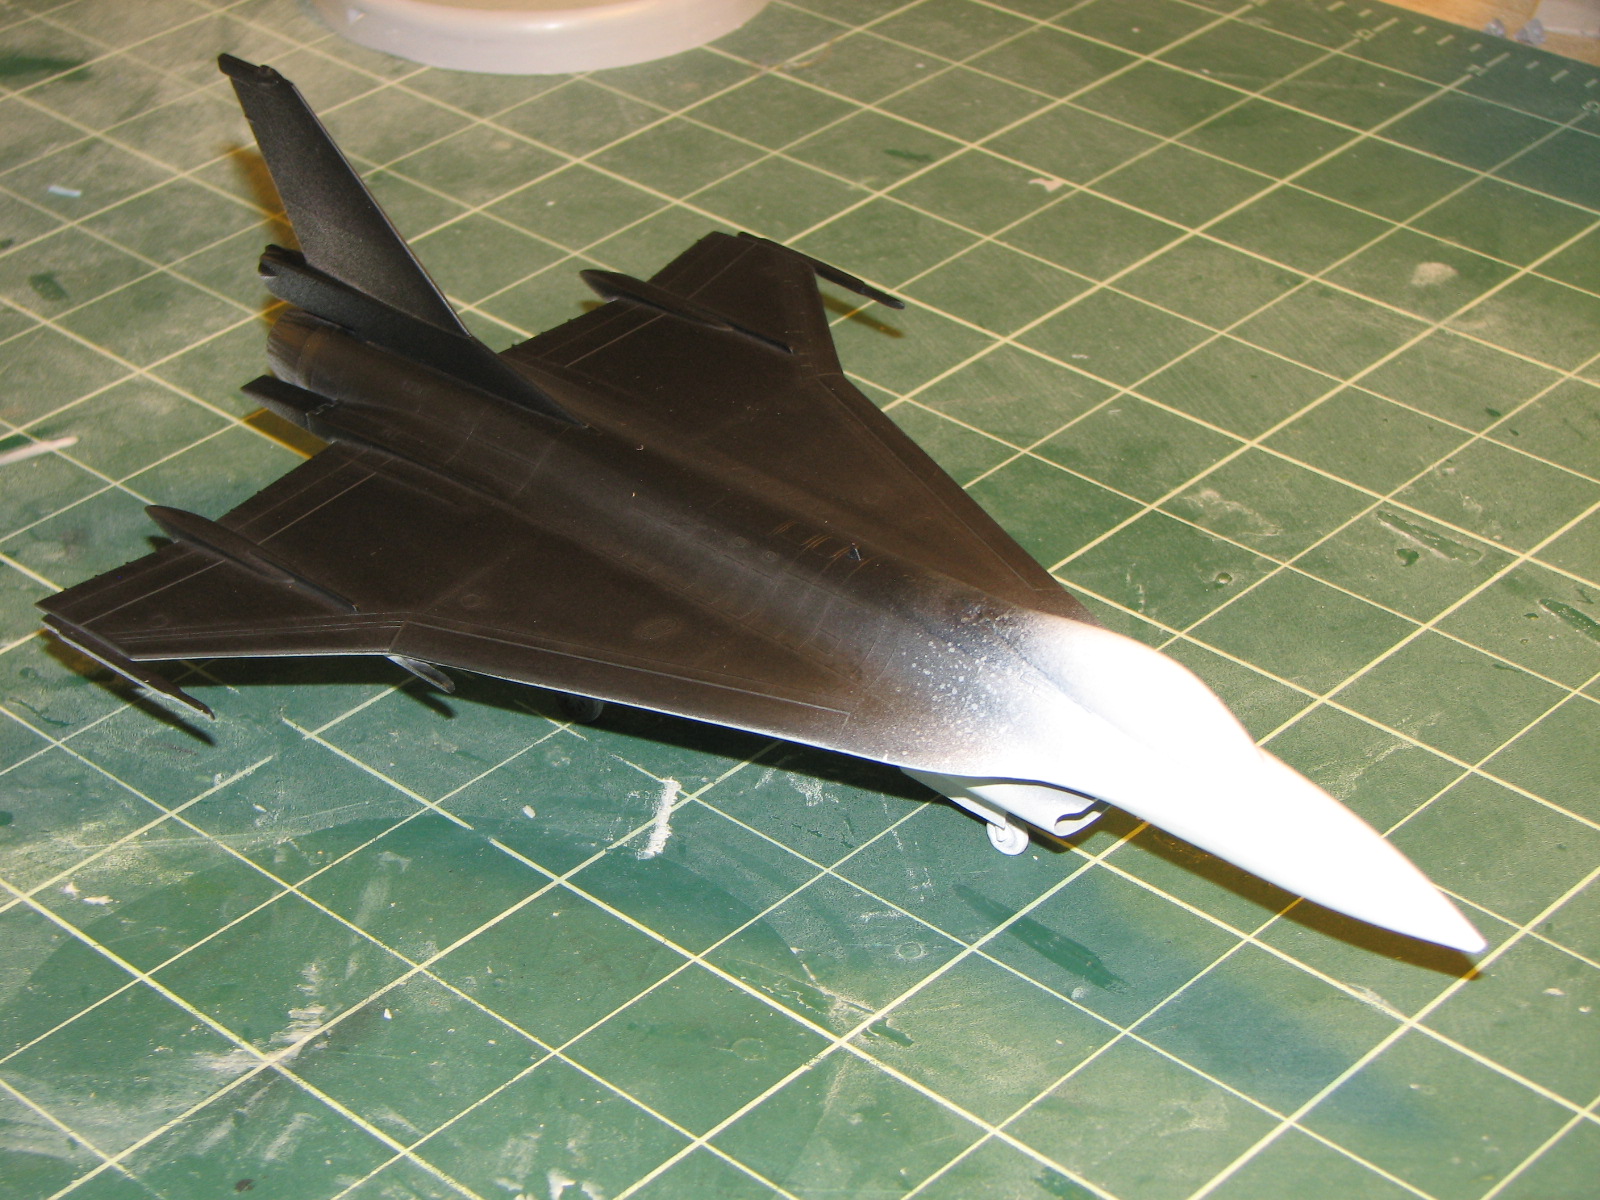
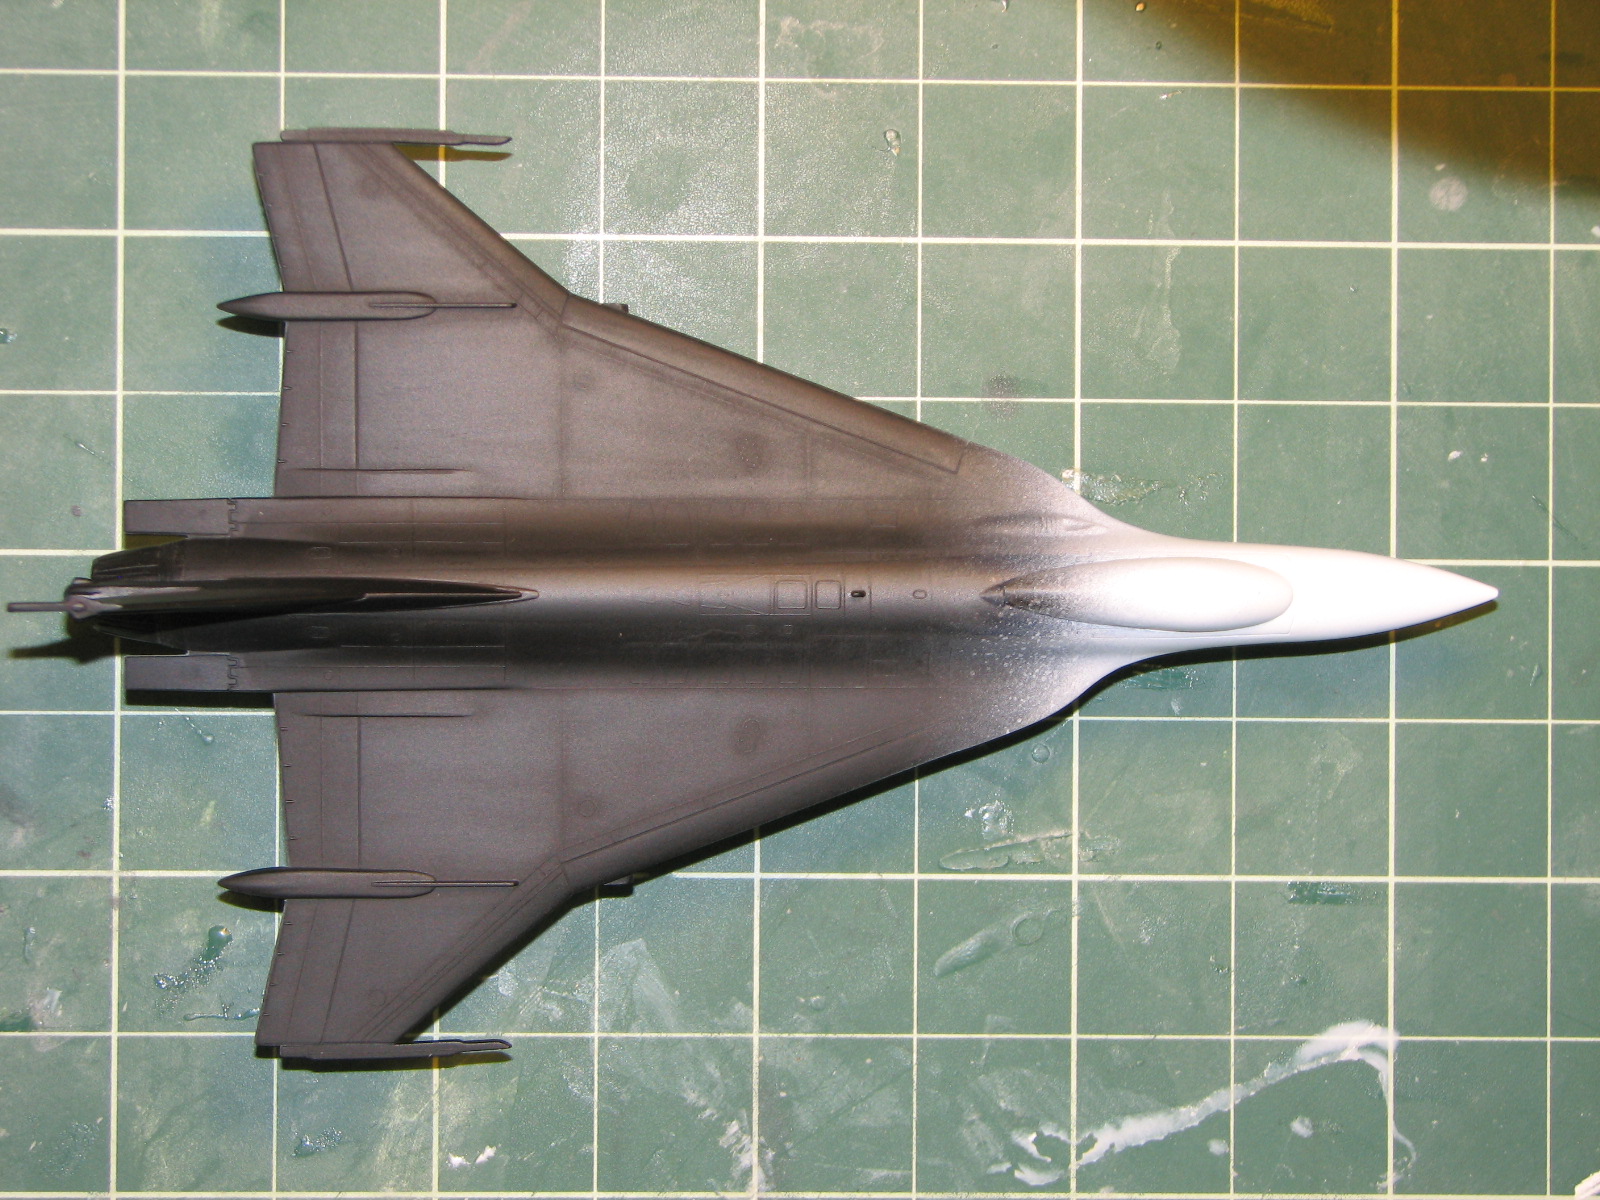
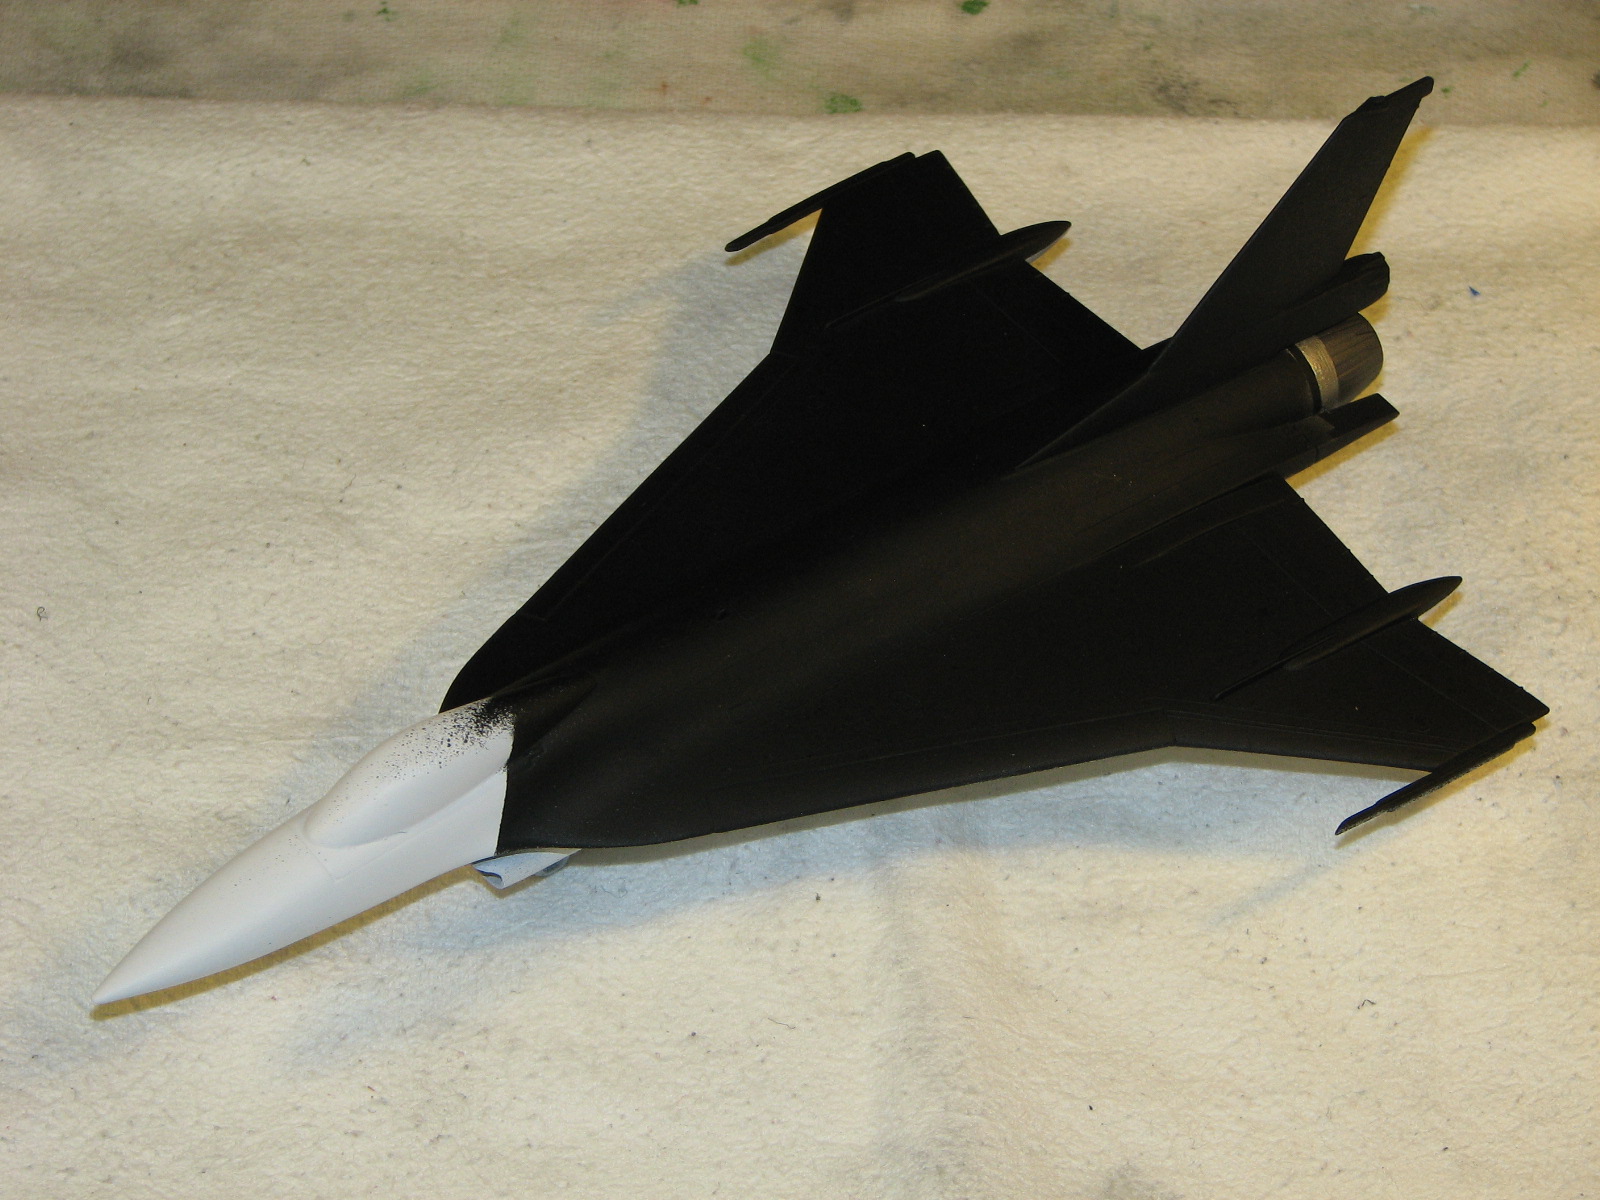
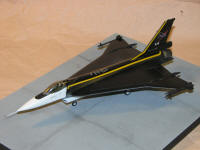
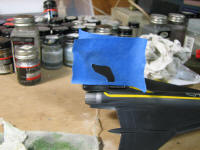
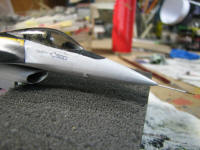
11/6/2010 - I masked off the white areas before
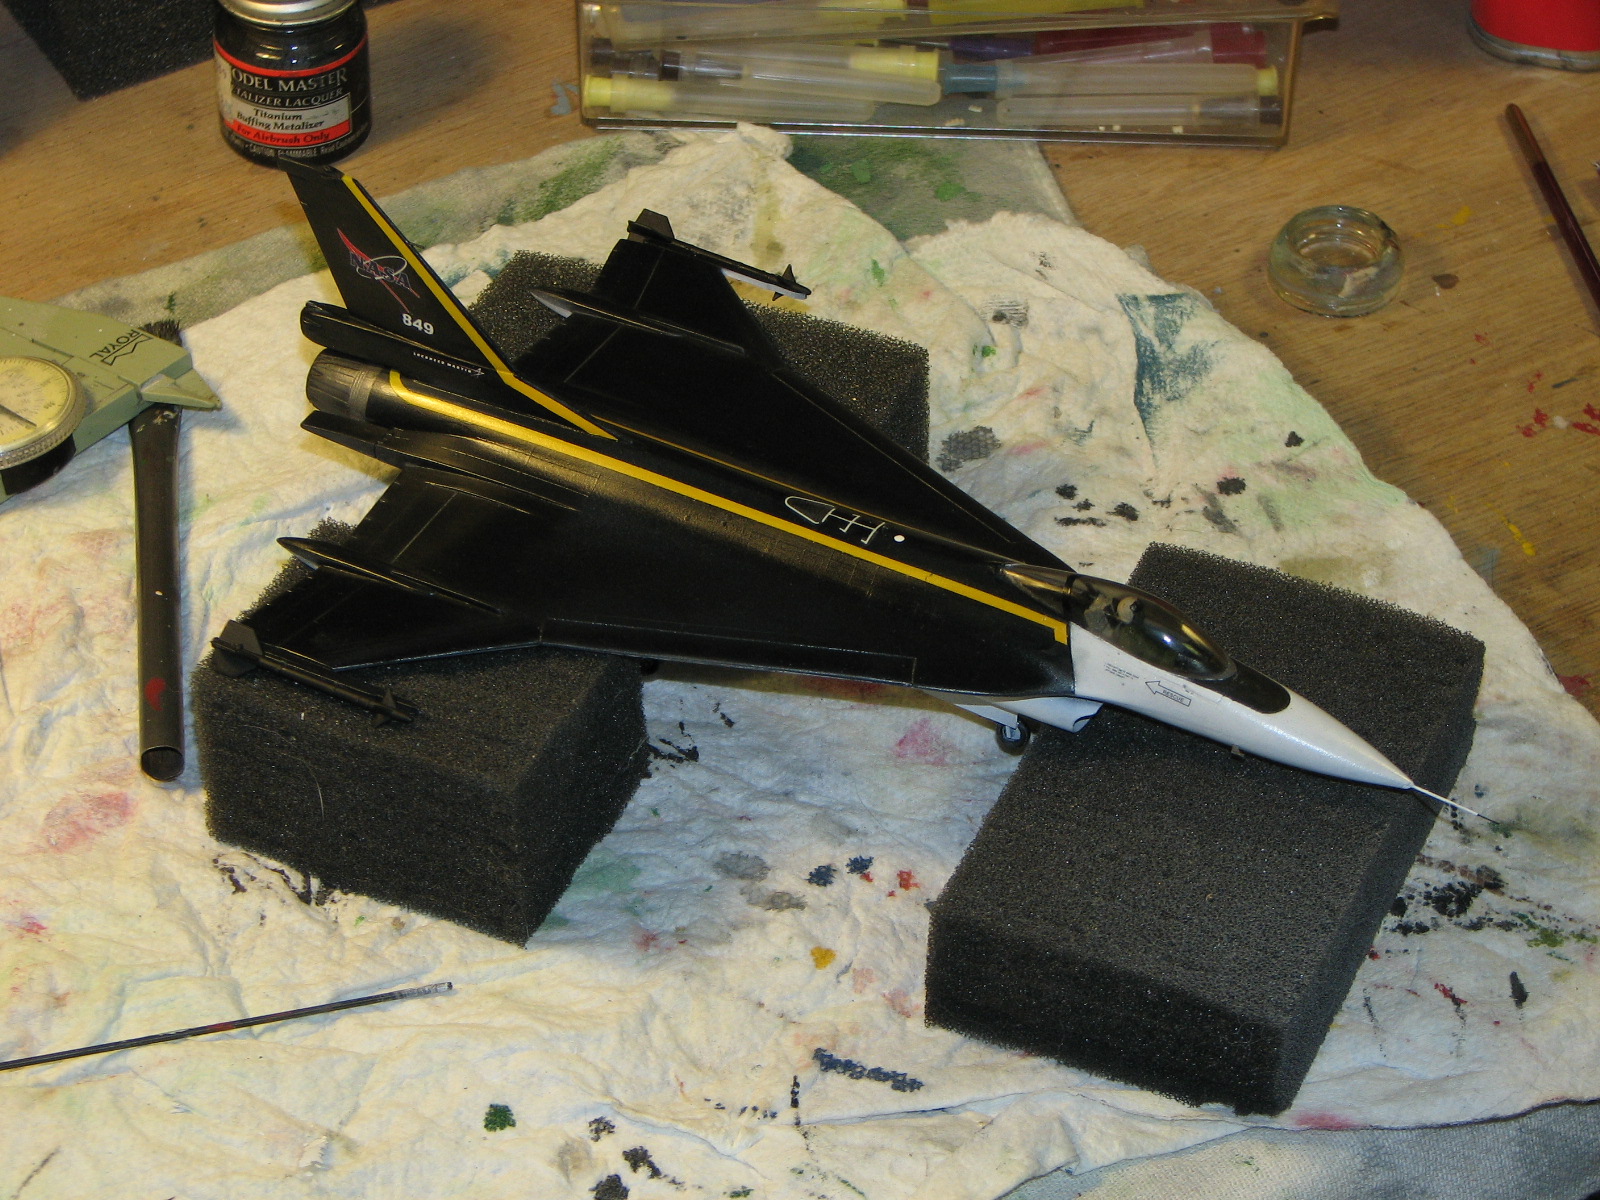
airbrushing over the black with model master flat black. The engine exhaust is
titanium metallizer with a band of steel just forward of it.
See also
http://modelingmadness.com/scotts/mod/us/f16xlpreview.htm
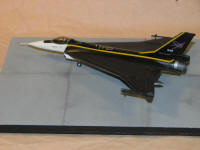
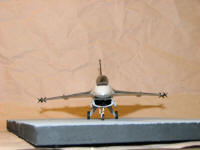
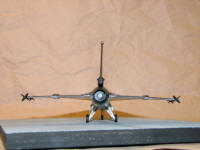
I noticed that the Dryden 16XLs did not have the wing gun that
this kit has. Dremel time! I ground it off using a 1/4" round bit and then
sanded it down, puttied the few gouges over and sanded again. Re-primed...

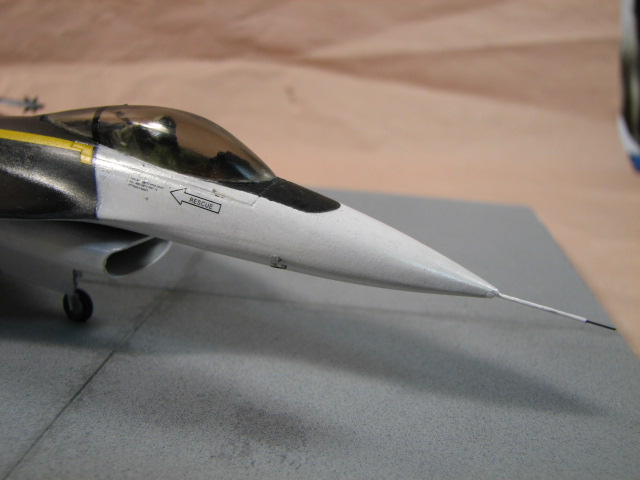
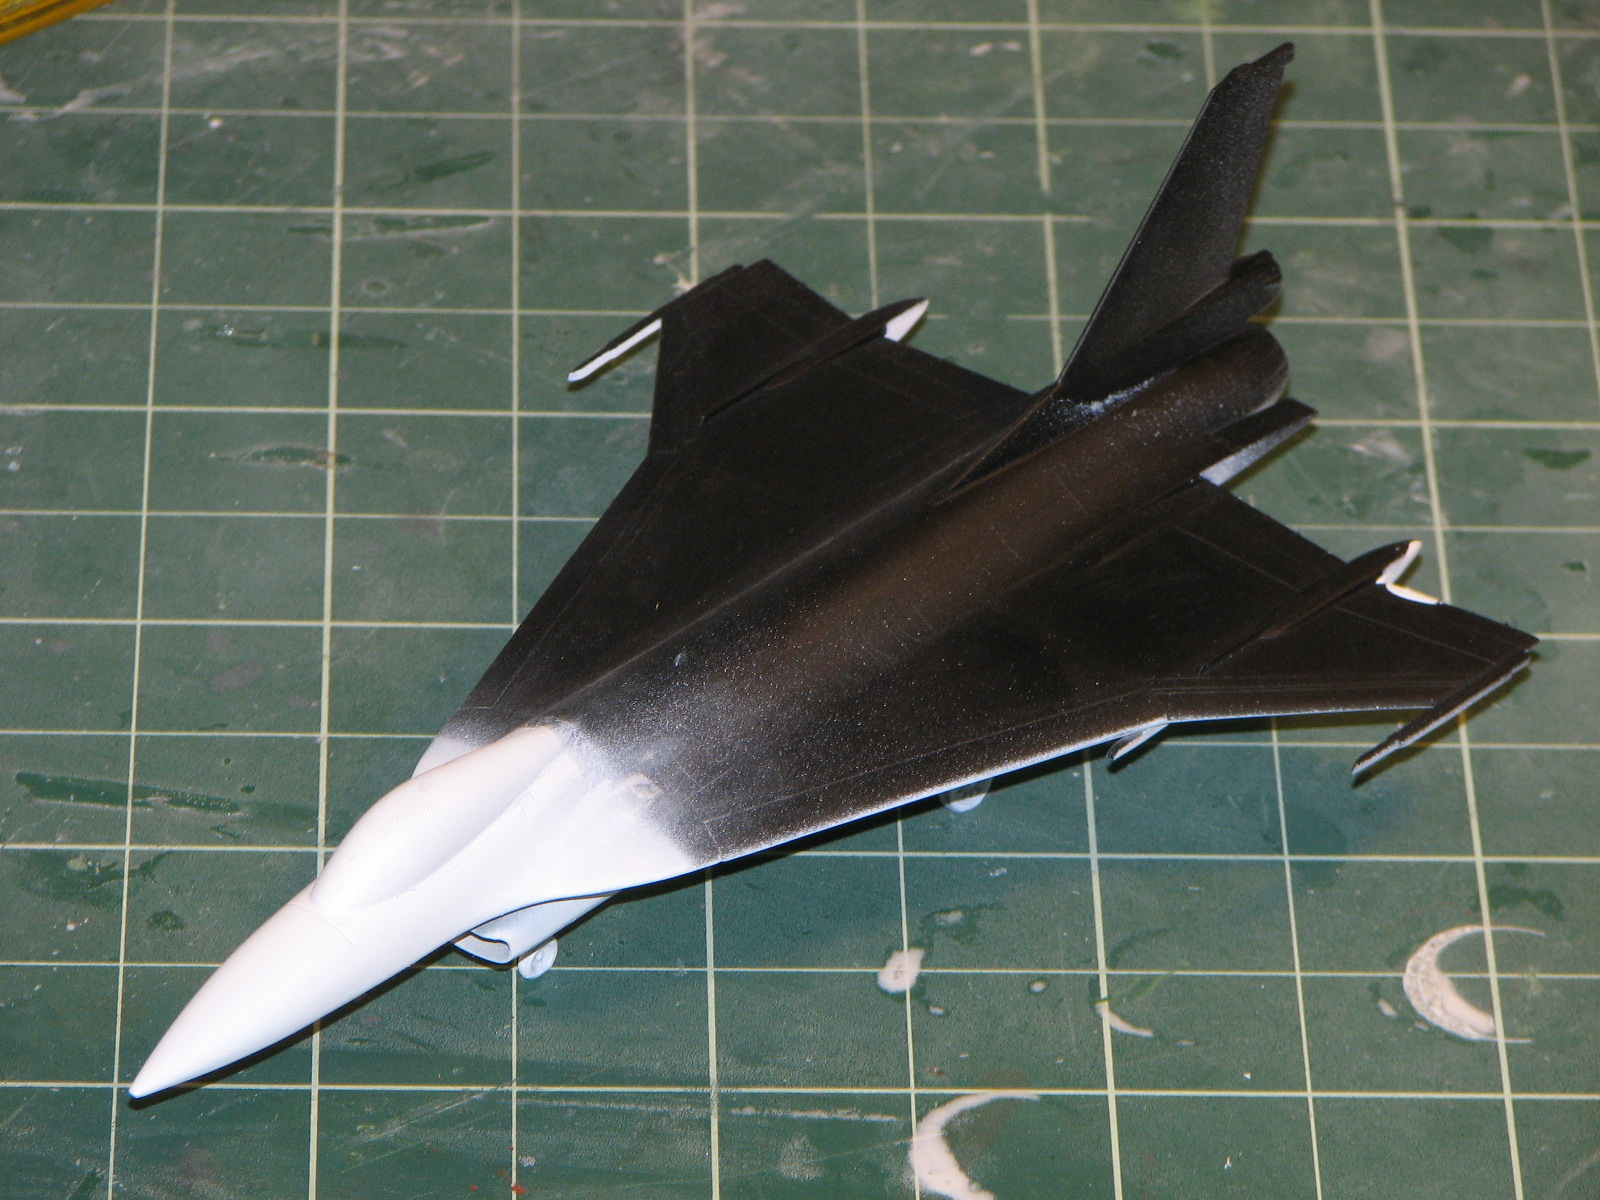
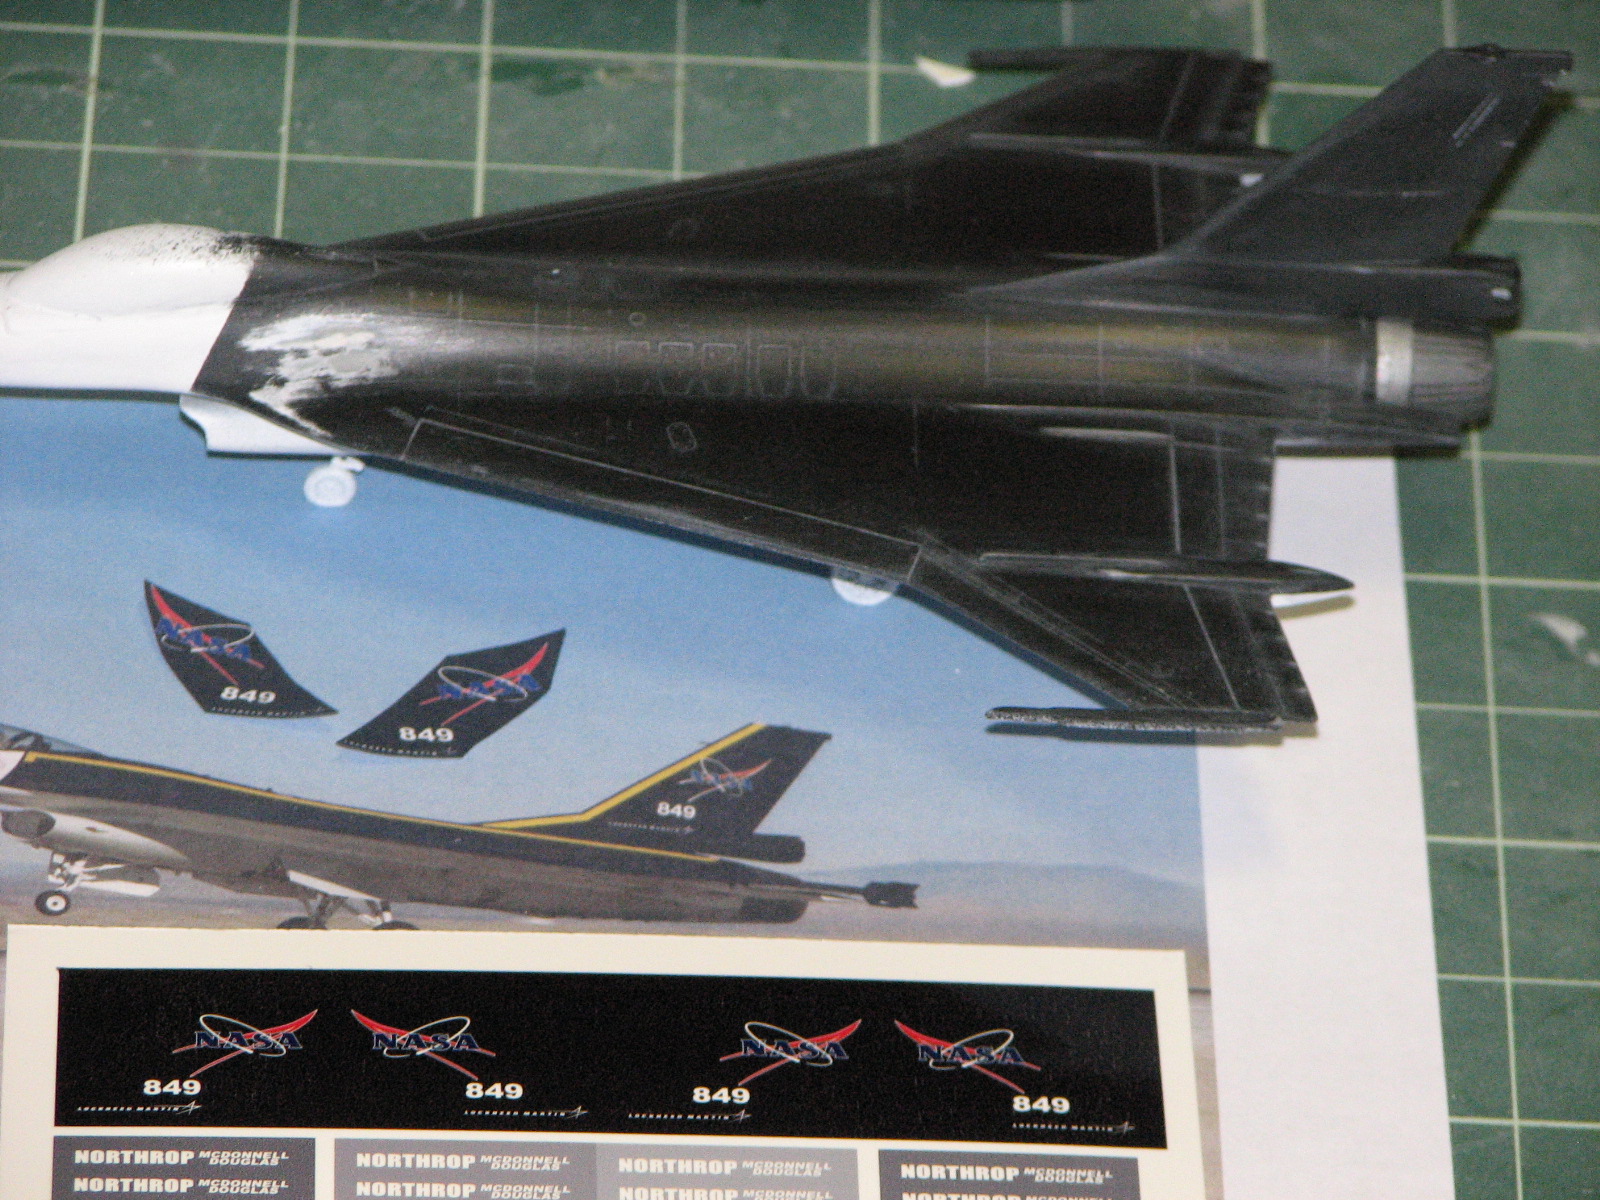
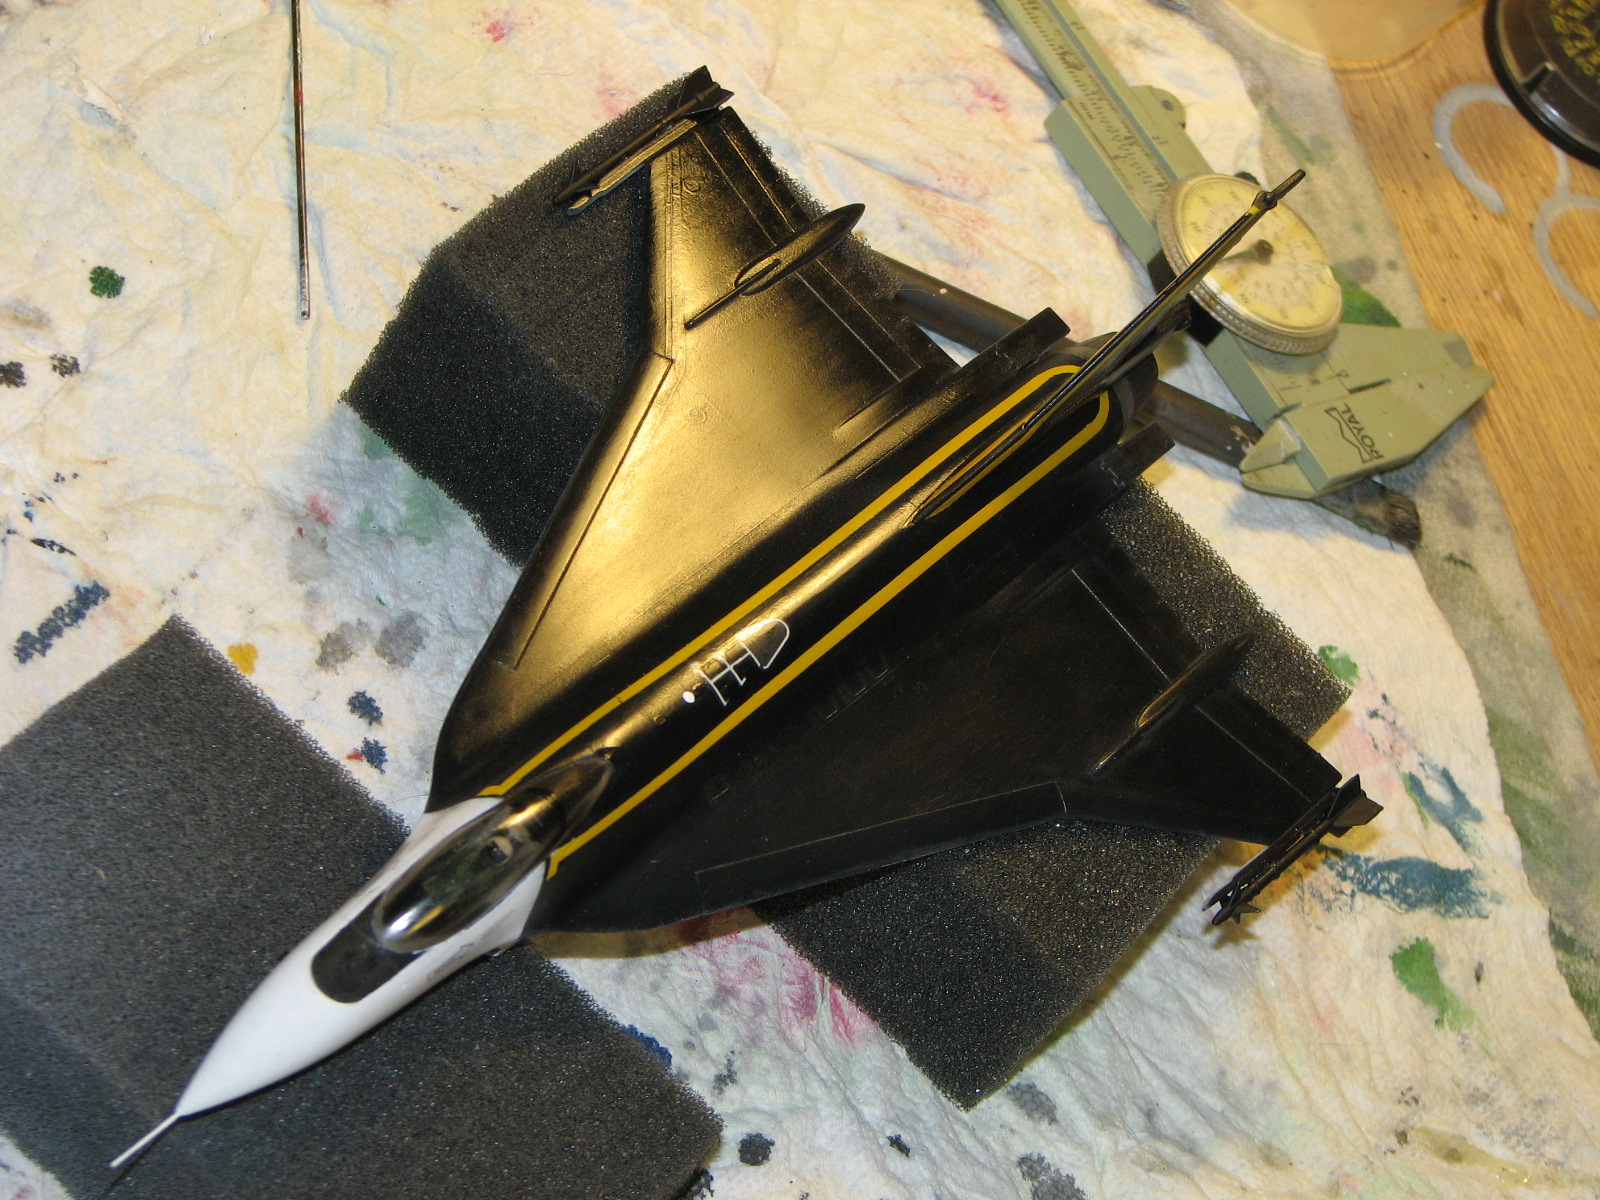
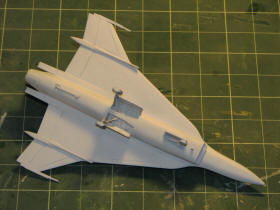
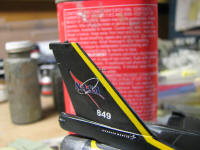
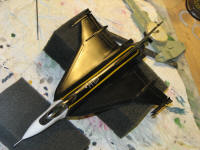
11/18/2010 - ...and over the past couple weeks, re-painted
again, masking off the white edges flanking the canopy and airbrushing black
along that line. I also removed the weapon mount on the undersides of the wings
- again, something not on the Dryden planes.


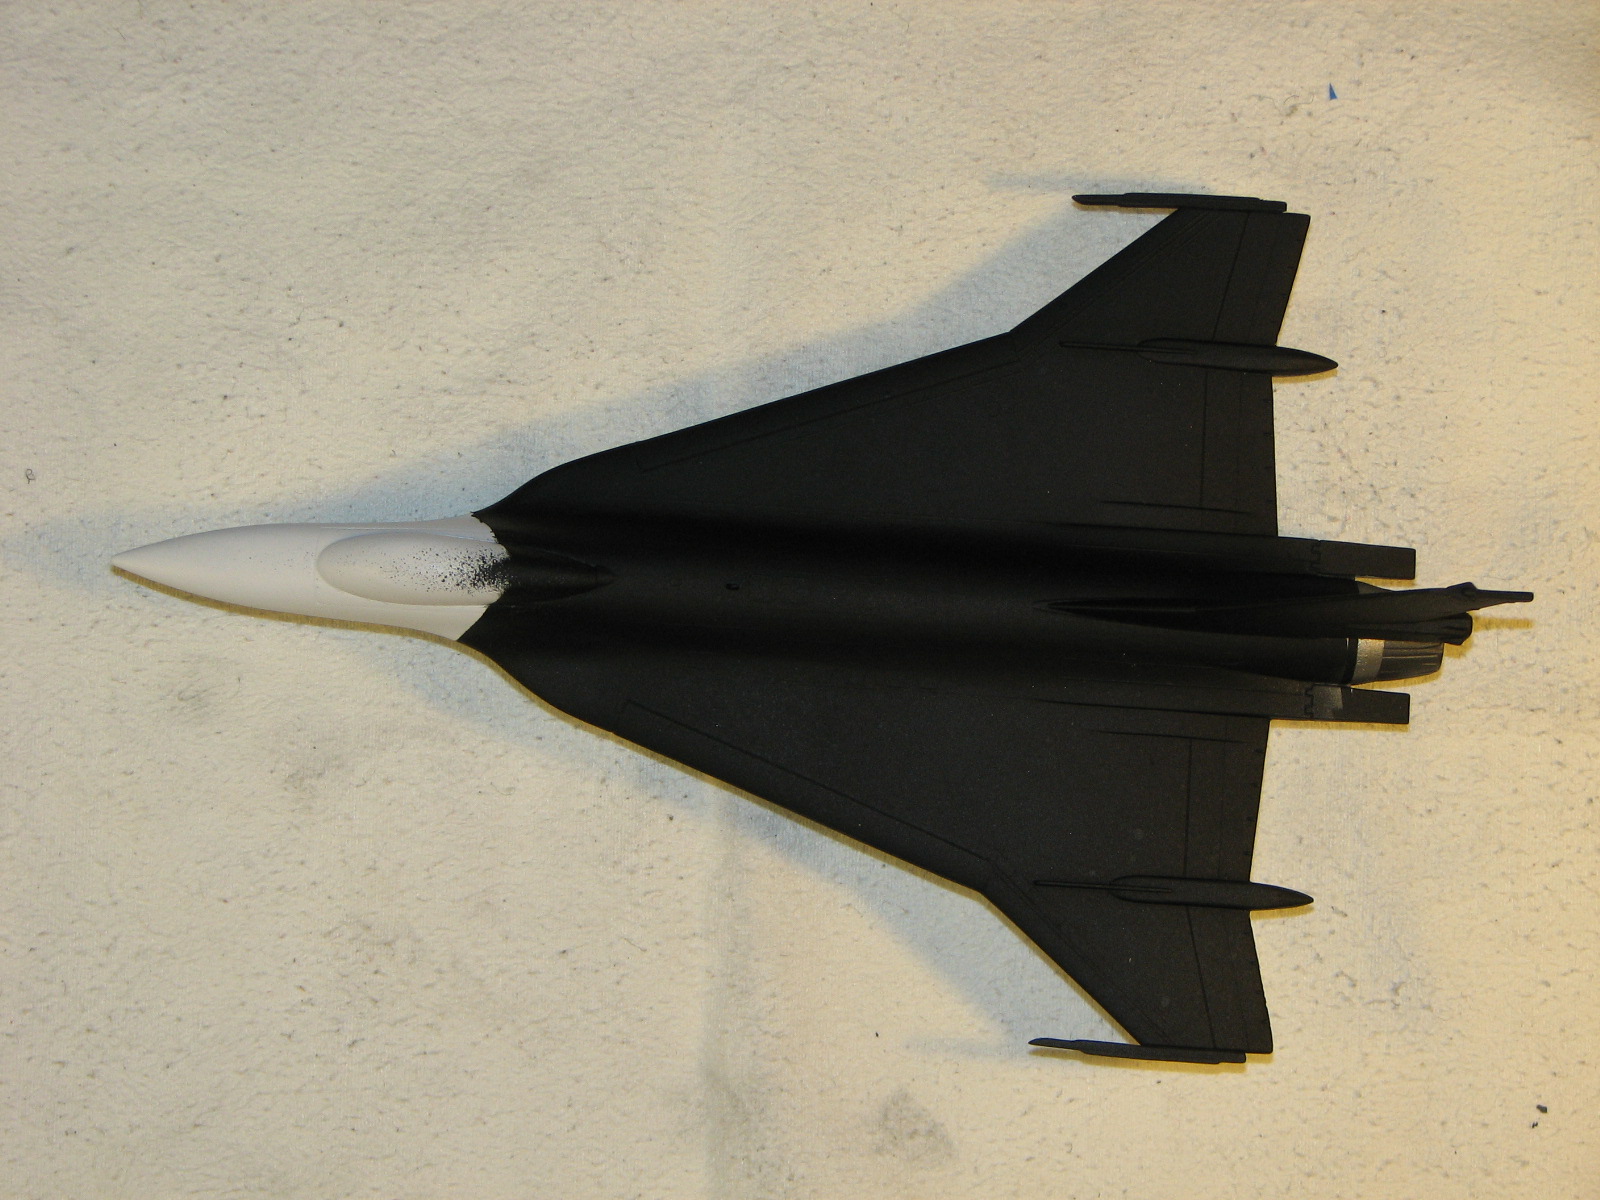
I've been giving the model a wet-sanding to remove some of
the paint build-up. Hopefully I'll not have many more re-paints on this. I still
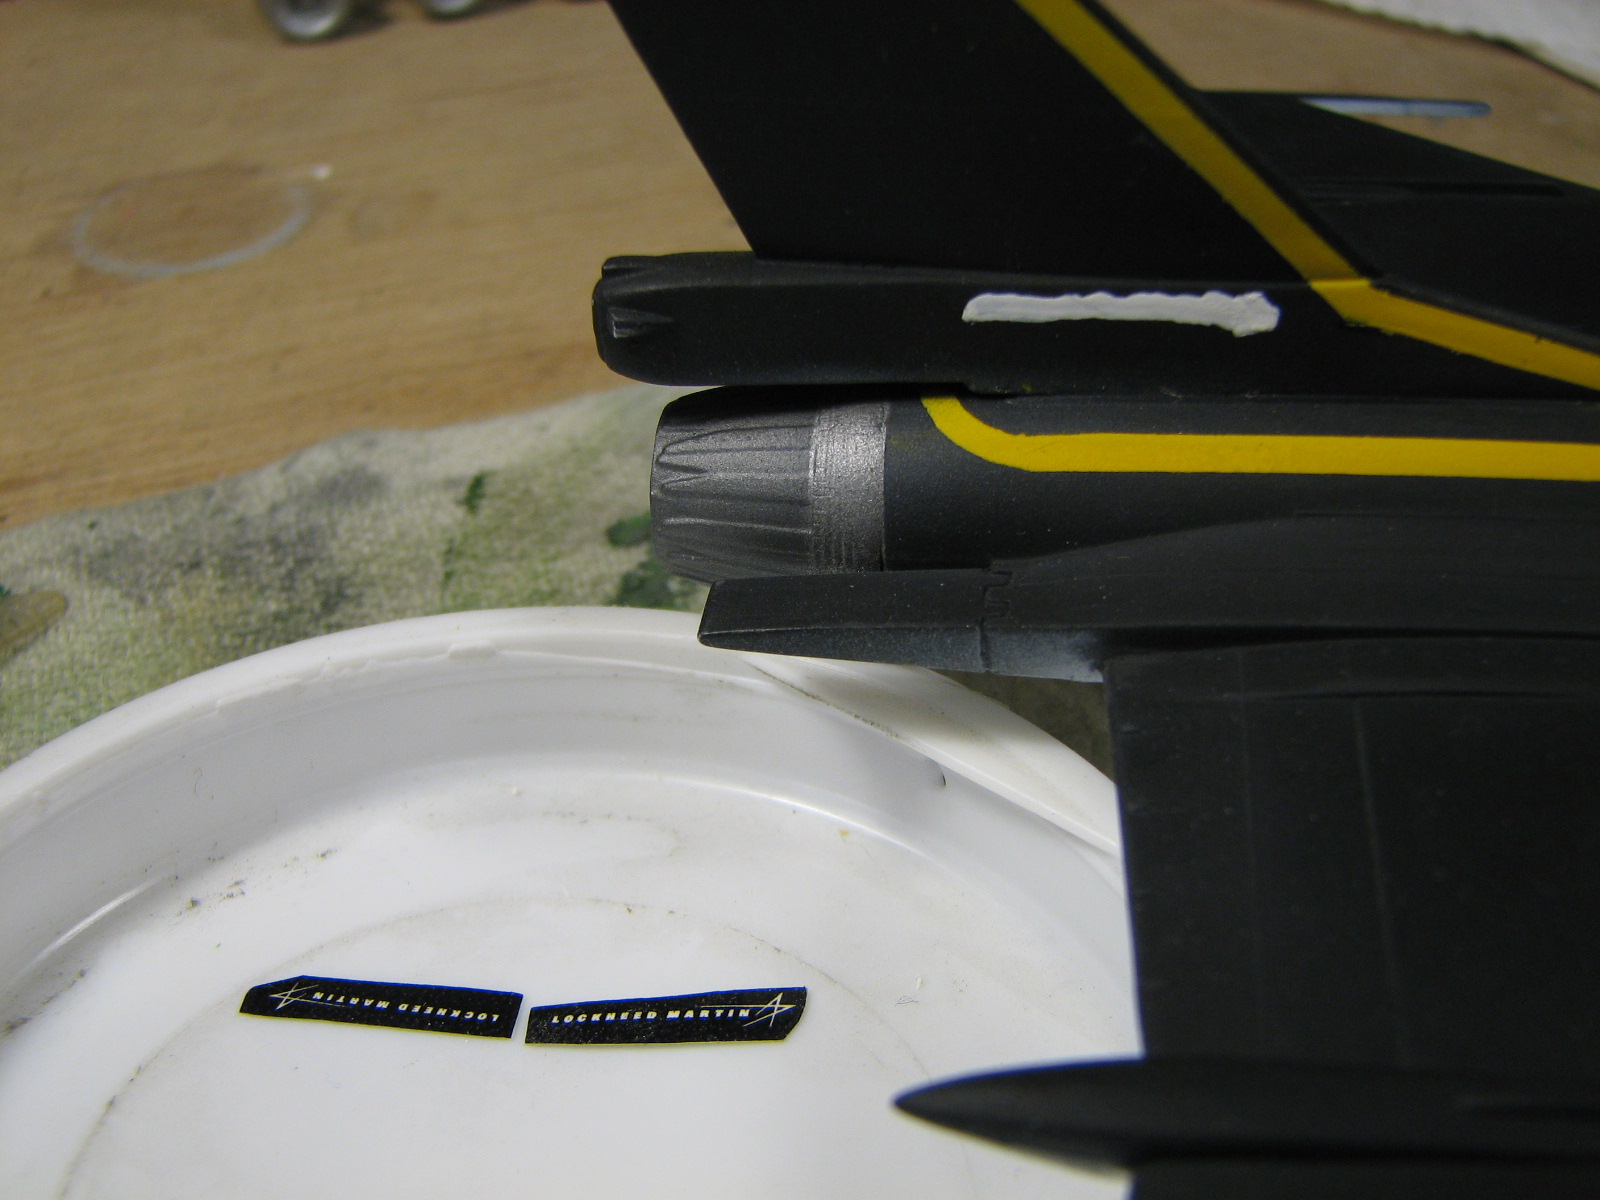
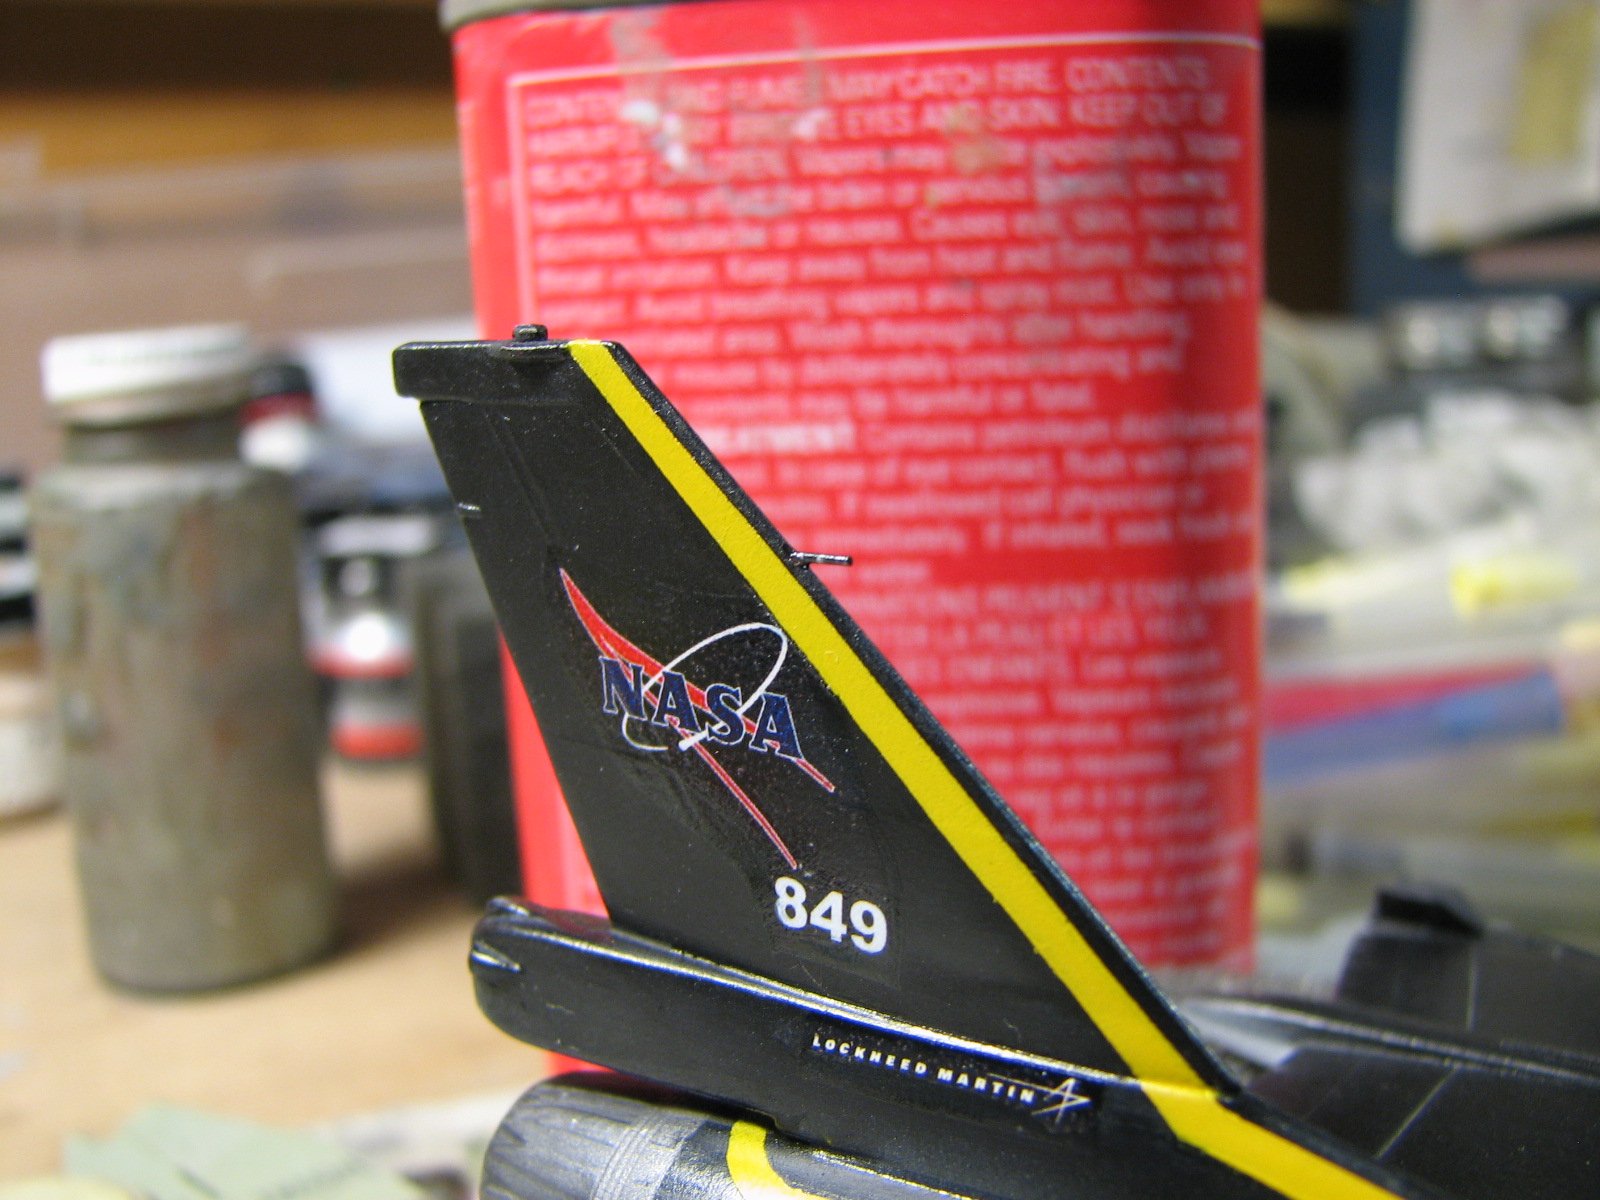
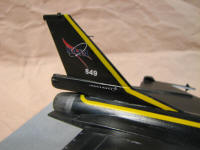
need to add the anti-glare panel fore of the canopy and yellow striping. The
NASA tail logo, tail number, and Lock-Mart logo are home-made decals that will
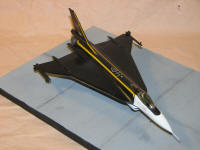
be applied over patches of white. My specific target for this model's look is
plane #849 as liveried for the Digital Flight Control System (DFCS) tests
starting on December 16, 1997.

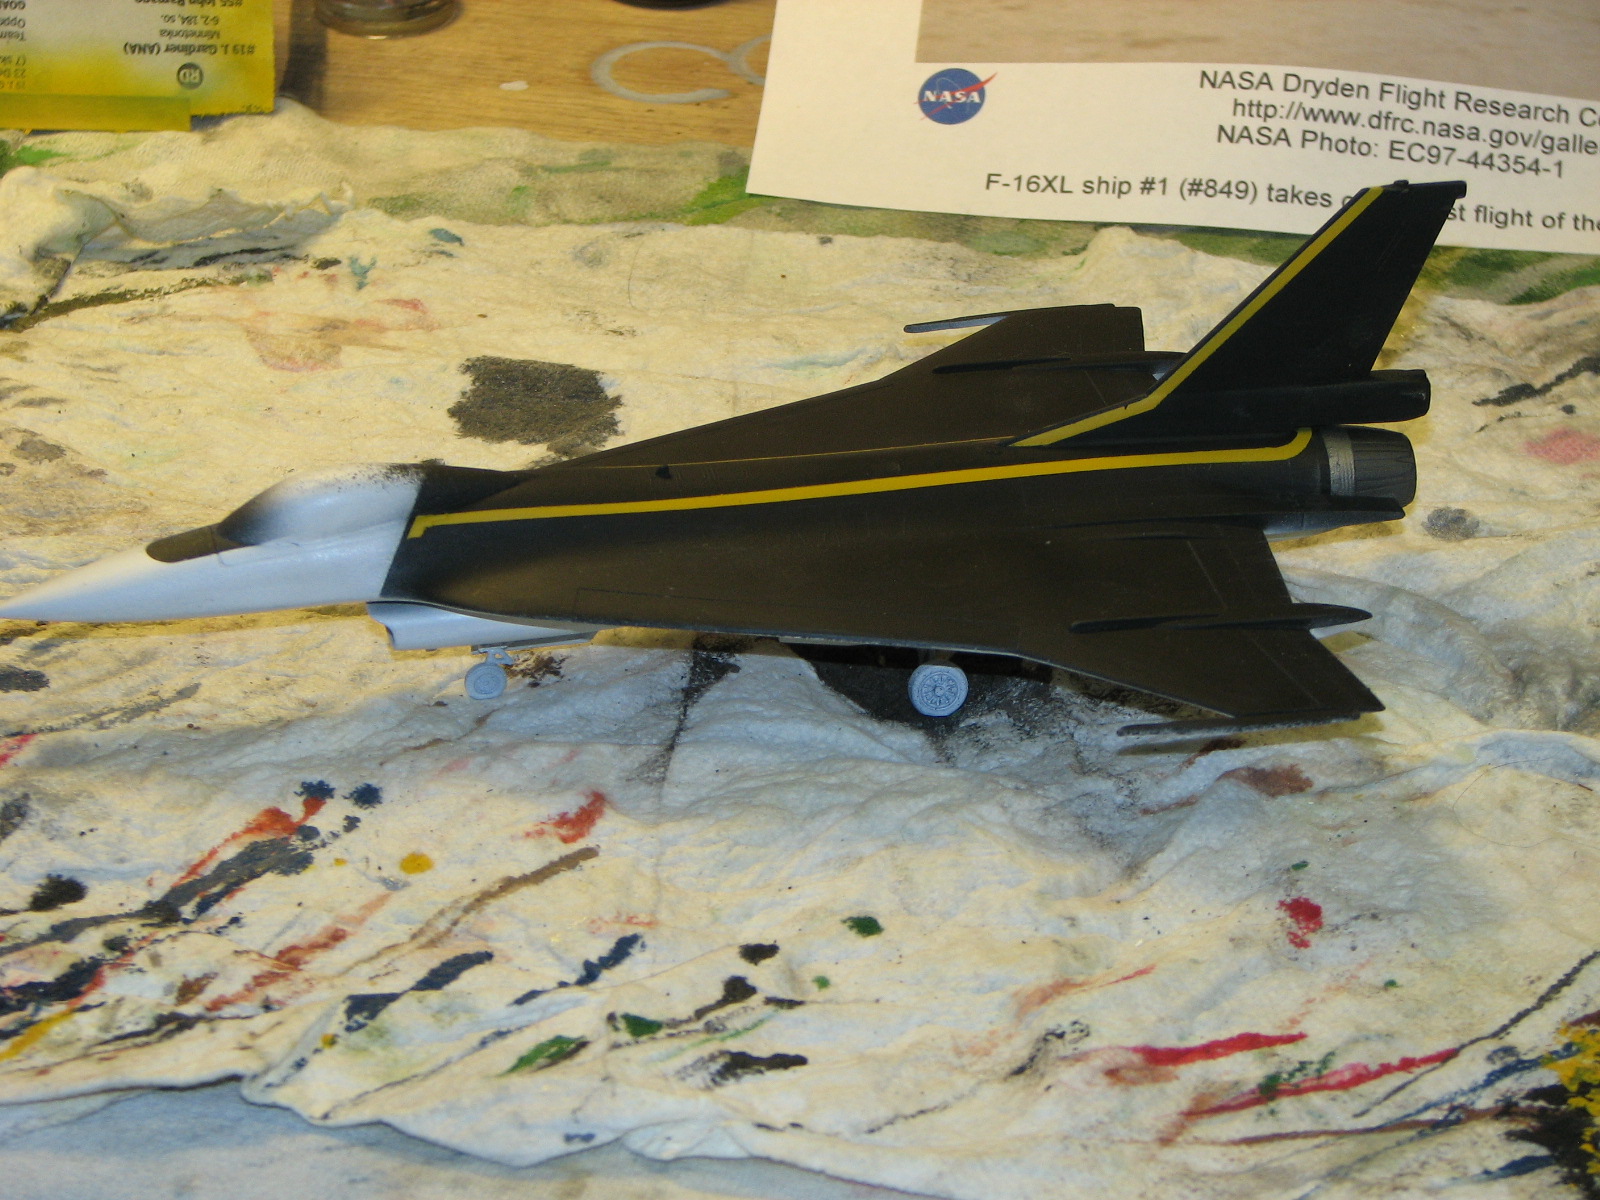
11/22/2010 - After 90 minutes of applying masking it took
about another 10 to airbrush the insignia yellow striping along the fuselage and
tail. A little touch-up work is still needed. After the yellow paint dried I
wet-sanded it lightly with 600-grit paper.


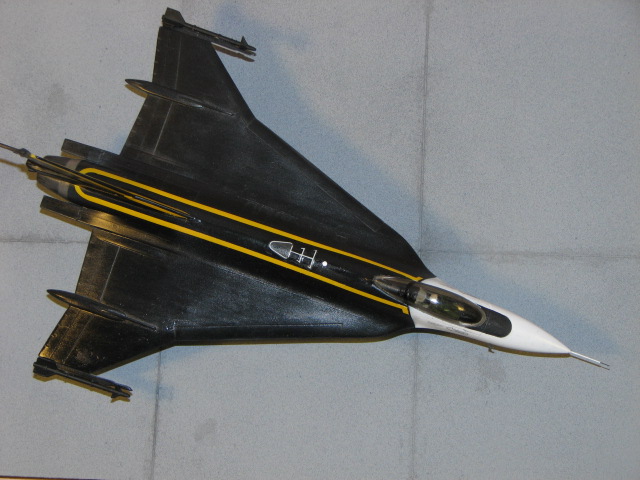
11/30/2010 - Pressing on to the decals and finishing
touches - I applied the tail decals over patches of white paint, letting the
paint show through the unprinted part of the decal. Other decals came from a
Superscale sheet for F-16s. The refueling port needed a slightly gray shading in
part of the decal - a small patch of flat there let that part of the decal
silver a bit.


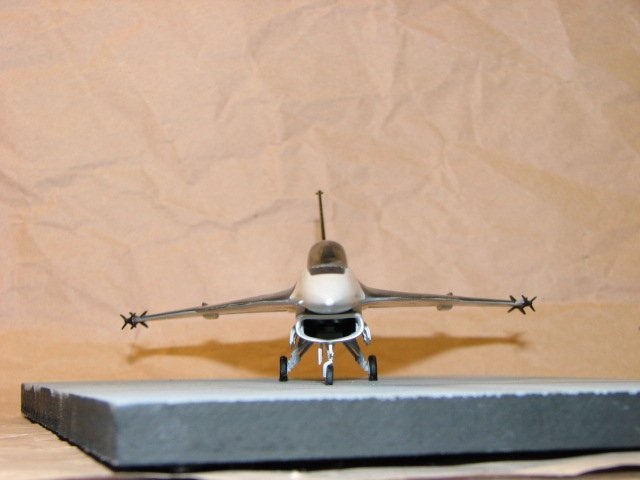
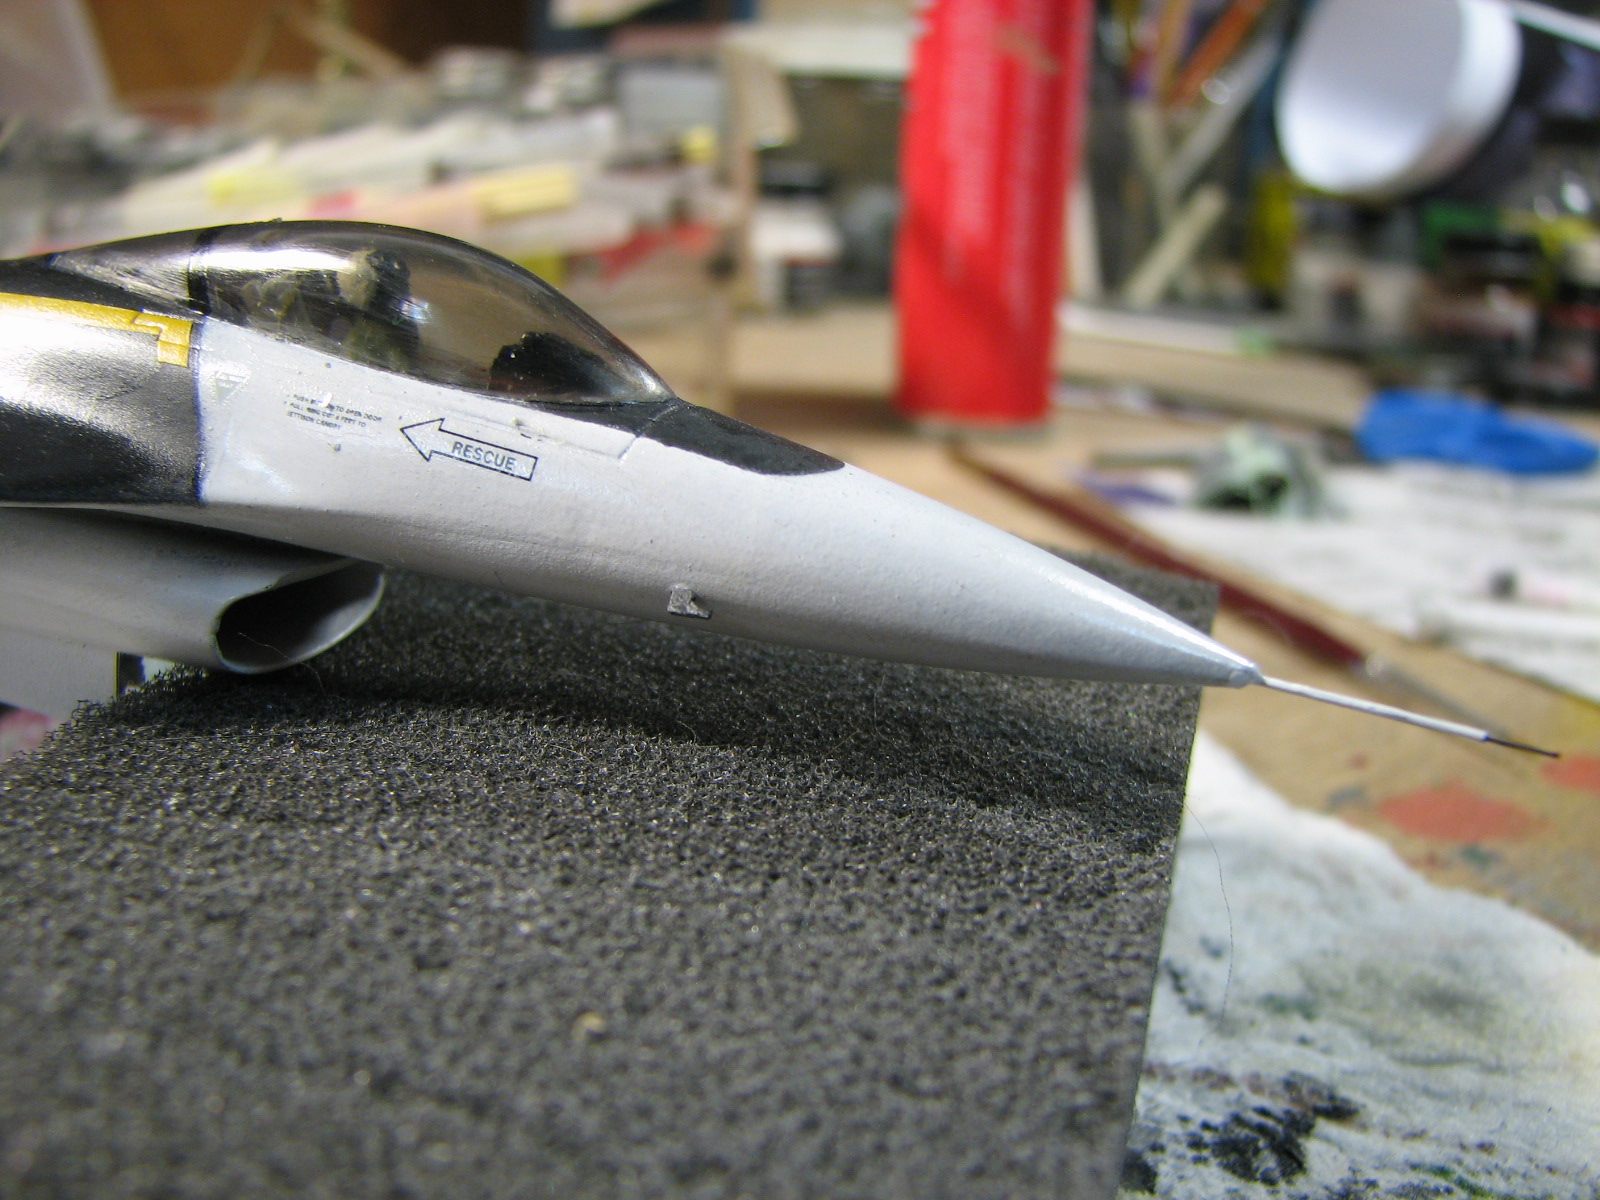
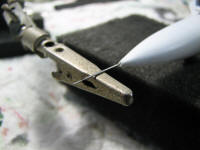
I added the tail leading edge tube and nose tube. The nose
tube is a short piece of guitar string wire inserted in a trimmed hypo needle. I
also made a small air sampling tube from styrene to attach to the right side of
the fuselage. Added the dummy Sidewinders to the wingtips. The finish coat is
Micro Mask, diluted and applied with a cotton swab.
The base is plywood (basswood) edged with black and topped
with 3 coats of gray auto primer. After it was dry to touch I scored the primer
for a concrete apron look and misted over it with a darker gray primer. I ran
some black acrylic wash into the concrete joints. And finally, I sugerglued the
plane to the base.