|

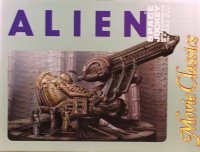
Halcyon Movie Classics
Alien "Space Jockey"
|
|
|
|
Stated scale:
|
1/60
|
  
|
|
Actual scale:
|
unverified
|

|
|
Overall length:
|
|
|
Material(s):
|
vinyl
|
|
Number of parts:
|
13
|
|
Stand included?
|
no
|
|
Decals included?
|
no
|
|
My Source:
|
SMS, St. Paul MN
|
|
Cost (w/o s&h):
|
|

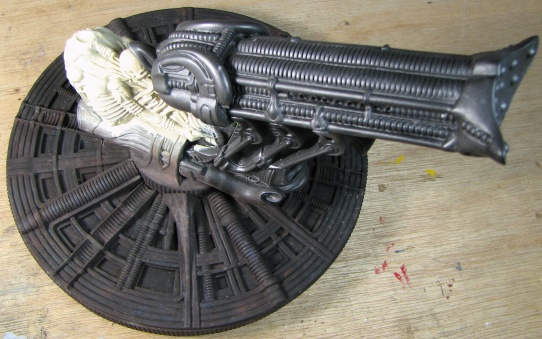
The first big job on this one was trimming away the vinyl pour
cones. Once that was done assembly was a breeze. I did the bulk of
trimming with a hacksaw, keyhole, or razor saw. I finished it off
using nippers and X-acto knife to trim away the rest of the cones,
and sometimes a bit more plastic, until the parts fit well together.
The fit of the telescope base to the jockey's seat required almost
1/8" of extra trimming before it would fit well. If a piece was
being difficult to cut - i.e. cutting out the center hole in the base
platform - I put the piece in hot water to soften the vinyl.
I assembled most of the parts with superglue. There was a sizable
gap in the fit of the telescope body to its mount. I used 5-minute
epoxy for that. The two support struts toward the forward end of the
'scope needed filling and sanding on their backsides. I used epoxy
and green putty for that. I attached them with superglue.
|
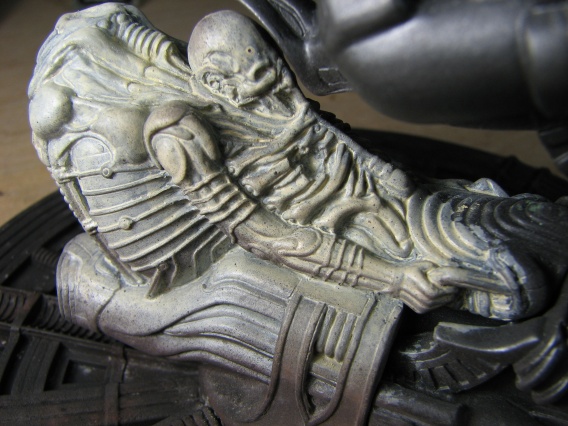
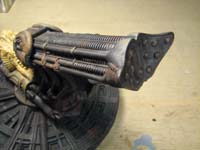
1/20/08 - I did the basecoat painting using black spray acrylic
for the platform and Metalizer gunmetal for the scope, per the kit
instructions' suggestion. And then the fun began. First item of fun
- grutting and griming the platform.
|
|
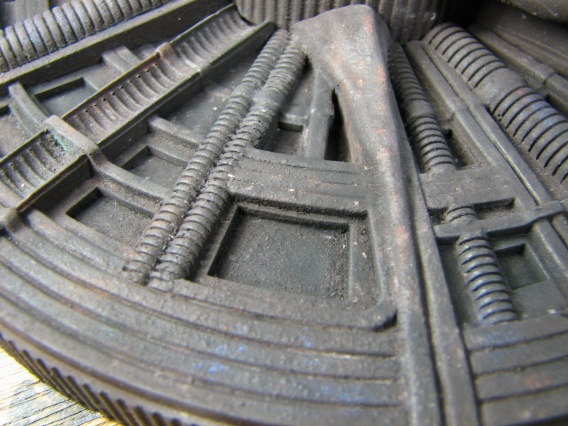
The vinyl casting is nice and smooth, but movie stills show
it to be dirty and somewhat eroded / corroded. I airbrushed over the
black with several coats of Testors rubber color with shaken-on
coats of Durham's water putty powder in between to build up a good
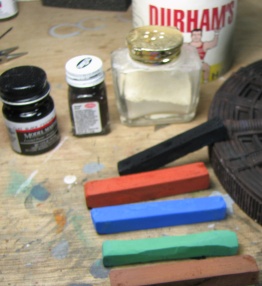
crud layer. I finished off the "grutwork" by scraping black chalk
overall and grinding it with with a stenciling brush. I added more
colors (rust, blue, and green) in a similar manner.
|
|
|
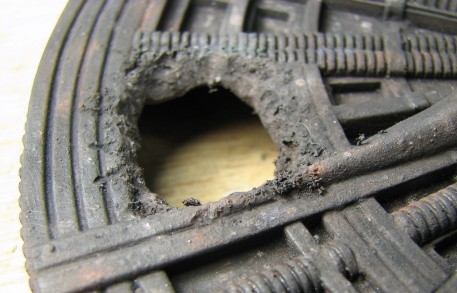
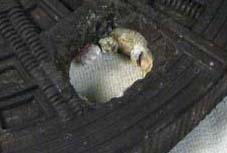
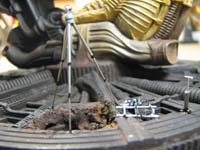
Next fun - I dug out the hole on the
"back" side of the platform (the one Kane goes spelunking down). I used a Dremel tool to cut out the
vinyl and wreck up the edges, then finished up with an X-acto to
trim away most of the vinyl fluff. I smeared superglue around the
opening to smooth down the edges - y'know the old "acid-for-blood"
melt job.
|
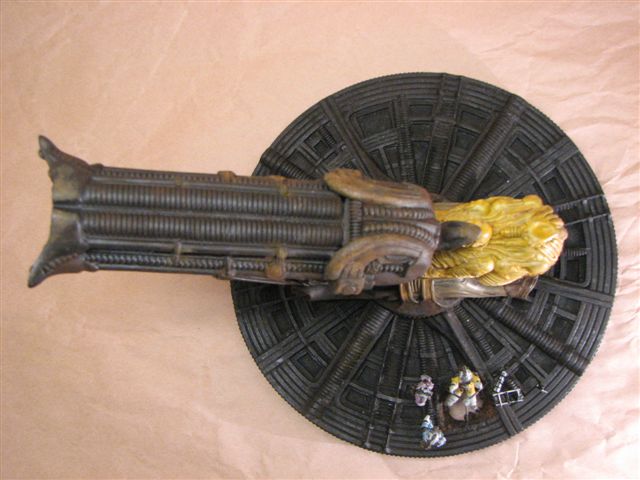
|
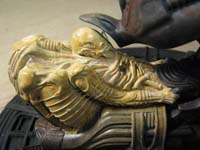
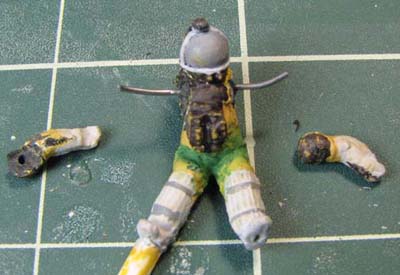
I painted the pilot by hand with 2 basecoats of Acryl radome tan.
These two "overall" shots are after the pilot's 2nd coat
of paint.
The Plan
4/6/09 – This project keeps evolving. The plan now is to
re-create the scene from Alien where Kane heads down the
rabbit hole. I started work on the figures of Dallas, Kane, and
Lambert - and on the metal tripod that Kane will be hanging from.
Yep, I decided to make use of the hole, rather than have 3 plain
standing figures. D & L will be standing nearby as Kane begins
his descent.
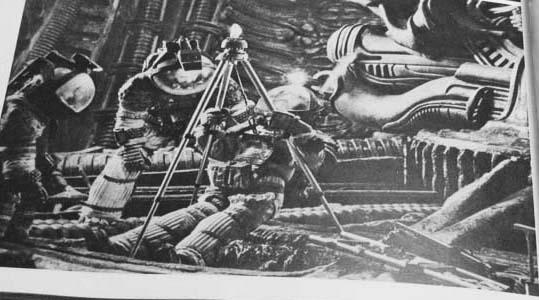
This wide shot never made it into the movie; this is a still from
The Book of Alien.
|
|
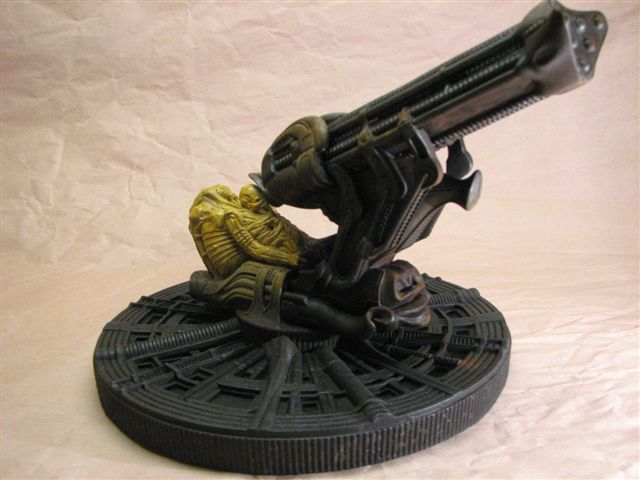
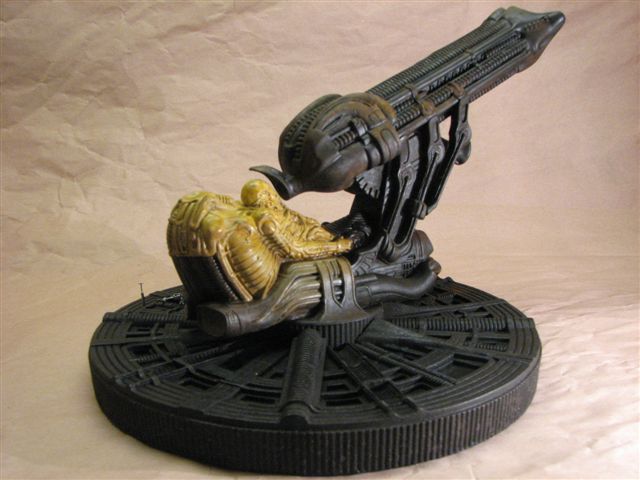
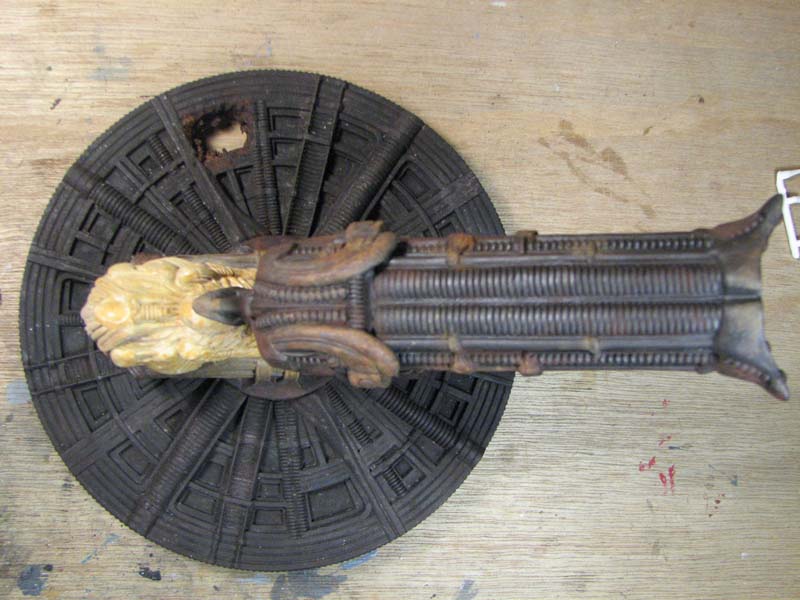
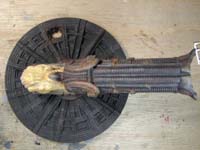
The Derelict Pilot, Platform, and Telescope
Just to review – paint on the pilot and telescope platform
so far is:
Pilot: 2 coats hand brushed Acryl radome tan
Platform: Black acrylic base, grutted up with coats of Model
Master flat black and Testor's rubber airbrushed onto Durham's water
putty powder. This is touched up with various colors of chalks.
Telescope: Metalizer gunmetal base
|

|
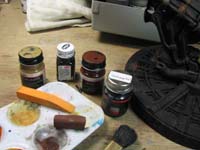
The rest of the work on the pilot consisted of several wash
coats, first of Model Master wood, then some Tamiya acrylics:
clear yellow and clear orange with touches of white and flesh. I
dabbed some pale yellow and pinkish chalk dust into the paint too,
and some brown chalkdust went into the chest-burster hole. There
is a very light wash of Acryl pearl over some parts of the figure.
|
|
|
To finish the telescope I used Testor's rubber, Model Master
rust and wood paints, and rust-brown and ochre-orange chalks. My
basic technique was to begin with a wash of rubber, then work in
some rust or wood paint and/or dab on chalkdust, depending on the
color needed in that area. I'd then work the paint and dust
together until it has the look I wanted. I also built up a couple
“drip spots” on the platform under some of the
telescope's fiddly bits.
|
|
|
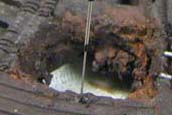
The platform was essentially finished, however I did decide to
add a little more thickness and structure to the rabbit hole. I
epoxied in some balsa wood, bits of styrene rod, strip and square
tubing, all of which I chewed up and meltified with a soldering
iron and hot needle. I brushed over this with rubber and chalks.
|
|
|
Annndd.... I'm calling it done. This is the sort of work where
you can just keep doing One More Thing. That way lies madness.
|
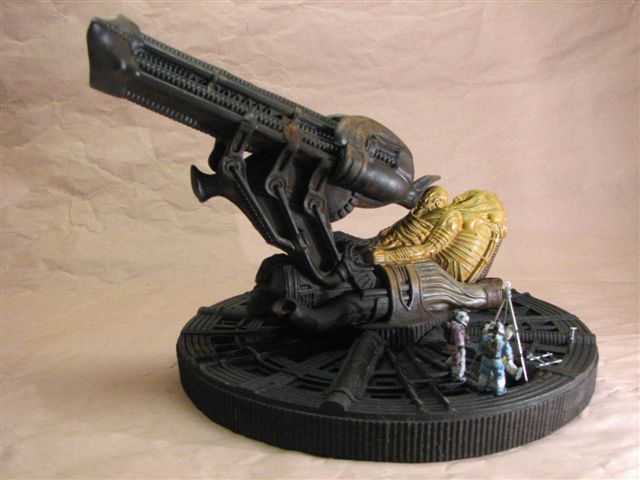
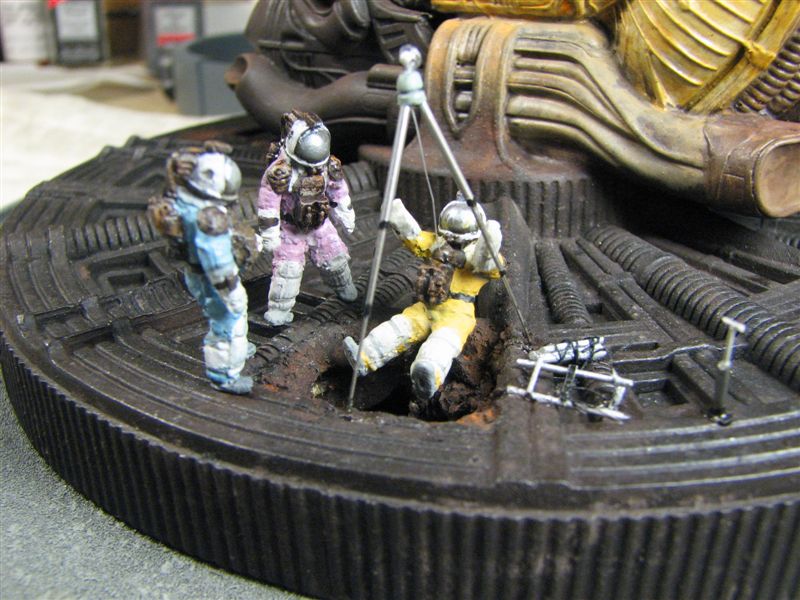
The Tackle
In a few shots in the movie, Dallas can be seen carrying a bundle
of tubing and such. This evidently is the collapsed tripod and other
tackle visible in the “Plan” photo. I broke this down
into the tripod, a rack/frame, a bundle of tubing, and an air pump.
Or maybe that thing in the lower right of the still is a
fire-in-the-hole switch. I made the frame, bundle, and pump out of
styrene rod & strip, stretched sprue, and black thread.
|
|
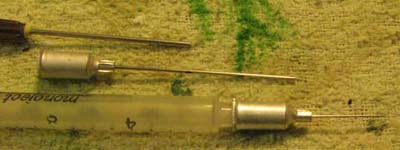
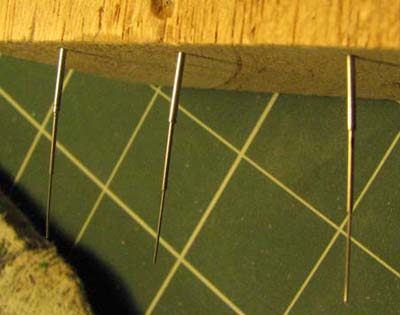
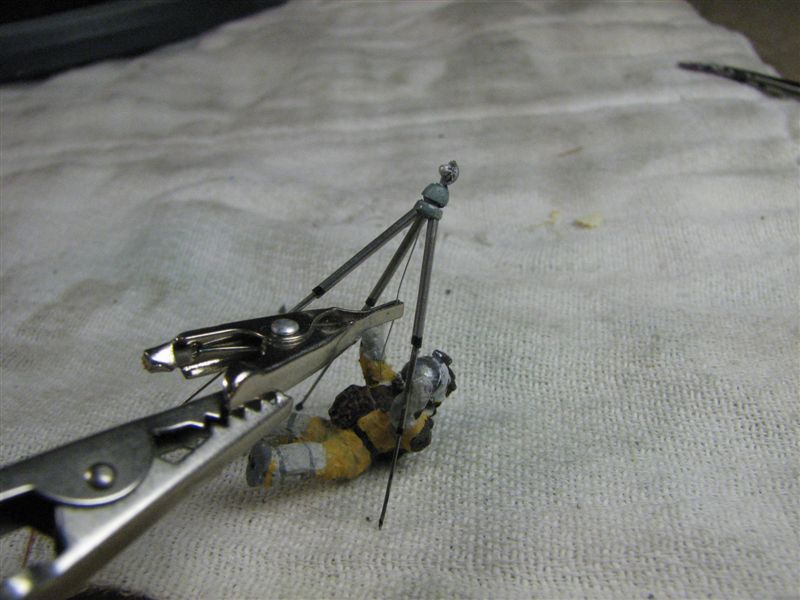
The tripod was more complex. I used three sizes of hypodermic
needle (a great source of very tiny metal tubing!), each of which
could fit inside the next larger needle. I cut lengths of needle
based on measurements from the “Plan” still, scaled to
the length of the Dallas figure's leg, slipped the tripod segments
together, measured the lengths exposed and superglued the joints.
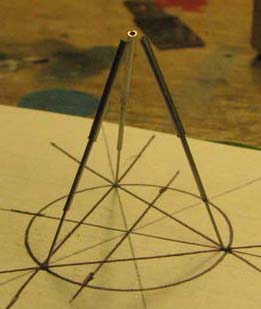
To assemble the tripod, I drew a triangle on an index card and
pressed it onto a slab of modeling clay. I poked the legs into the
clay, which held them in place as I worked them around to their
proper position. I then added a styrene top piece using superglue
and topped it off with a tiny reflector dish (heat-shaped styrene
sheet) and a pinhead for the lamp. I dipped the leg tips into
green putty to make rubber feet.
|
|
|
|
|
|
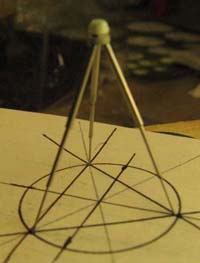
I finished up the tripod with some black paint at the leg
joints, gray for the cap, and pearl for the lamp & reflector.
I superglued all the tackle in place on the platform and touched
up the area with Testor's rubber paint to cover the shiny
superglue patches.
|
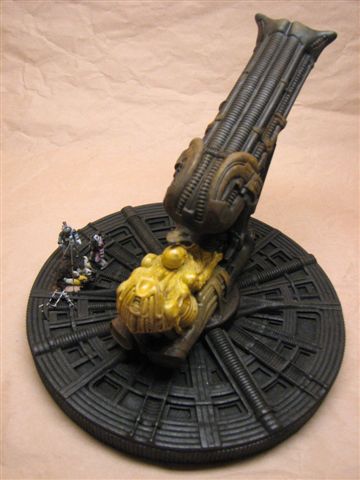
The Crew Figures
The figures supplied with the kit were in basic standing poses,
not suitable for the 'down the rabbit hole' scene. I cut apart,
repositioned, and bent the arms and legs on the Dallas and Lambert
figures. I used a razor saw to split their arms away from their sides
and to separate their legs. I cut out some vinyl from elbow, knee,
and hip joints so the vinyl could be heat-softened and bent. I
superglued and green-puttied the posed limbs prior to painting.
Kane's figure needed a bit more draconic measures to get his arms
into the 'grip the tripod' pose. I cut off its arms and drilled small
holes in the shoulder joint surfaces so I could insert a short piece
of electronics solder. This served to let me reattach the arms and
position them for his grip pose. I filled in the resulting armpit and
shoulder gaps with green putty. |
 |
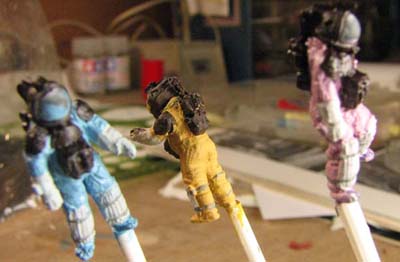
The basic suit colors mixes I'm using are (L-R) Lambert in Testor's sky
blue / MM light gray, Kane in MM insignia yellow & light gray
with a touch of insignia red, and Dallas, who must've drawn the short
straw and ended up with the pink suit. That's Humbrol Polish crimson
/ MM light gray. Other colors on the suits are MM light gray
(shinpads, etc) gunship gray (straps) rubber / military brown (packs,
helmets, epaulets).
For helmet faceplates, since there's no magical “make it
clear and put a face inside” paint I used a coat of MM neutral
gray covered with Tamiya clear smoke and a pearl highlight below the
headlamp.
|
 |
The Final Mount-Up
For the final assembly of this, I began by supergluing the Kane
figure to the tripod using a short piece of nylon monofilament and then
let it set up overnight.
I carefully transferred the Kane / Tripod
assembly to the derelict platform and positioned it over the rabbit
hole. Then I superglued them in place.
I superglued the Dallas and Lambert in place and... done! |
 |
 |