|

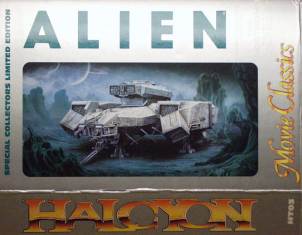
Halcyon
Commercial Towing Vehicle Nostromo
Alien
|
|
|
Stated scale:
|
|
  
|
|
Actual scale:
|
|

|
|
Overall length:
|
|
|
Material(s):
|
vinyl and styrene
|
|
Number of parts:
|
18 vinyl; 58 styrene
|
|
Stand included?
|
no
|
|
Decals included?
|
no
|
|
My Source:
|
local
|
|
Cost (w/o s&h):
|
|

12/15/2007
I must confess, when I first saw the movie Alien, I
didn't care for it that much. I'm not sure what it was; perhaps I just wasn't
expecting a gothic horror in space movie. But, like the alien itself, the movie
grew on me over time. So, when I saw that Halcyon was producing model kits from
the movie, and particularly, the Nostromo, it was a done deal.
I built the Nostromo sometime in the 1990s and the
model's held up well over the years, despite moves and road trips to display it.
There've been a few antenna/probe thingy replacements, but nothing major in the
way of repairs. Whenever it travels now, it has its own packing box and is held
in place with blocks of foam. I don't have any pictures of the assembly process,
so words will have to suffice.
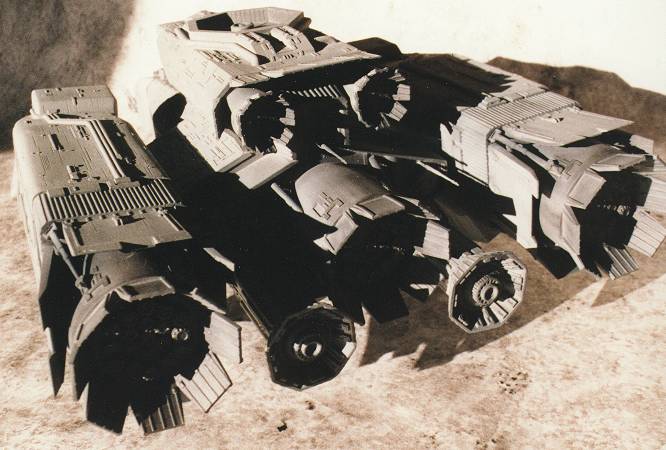
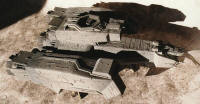
The large body pieces of the kit are cast in cold-pour
vinyl, like many of Halcyon's other models (e.g. Space Jockey, ED-209). So, the
first job of assembly was to remove the vinyl collars on each piece. I dipped
each piece's collar end in hot water - 120-150F - for about a minute to soften
the vinyl. Then I rough-cut the collar with a utility knife, leaving about 1/4".
I then finish-cut it with an X-acto blade. Note - make sure blades are fresh and
sharp; there's much less chance of a slip and accident that way. I re-heated the
pieces while trimming if the plastic started to become hard to cut. After
trimming I gave everything a good soapy wash and scored the mating surfaces for
parts, so the epoxy would have some tooth to bond to.
Body Assembly
After finishing the trimming for the body core, front
body, docking module, and outboard nacelles I began assembly by attaching the
nacelles to the body core. Well, not quite yet. The landing and braking
thrusters on the nacelles and dock module were just a bit plain - flat surfaces
where there should be exhausts. I trimmed out the flat areas and backed the
openings up with some detail panels - in this case some bits of Darth Vader's
TIE fighter wing panel from the parts box. The square "egg crate" texture worked
well here. I used superglue to tack the panels in place and applied epoxy to
firm up the attachment.
Engine nacelles: The nacelle-to-body fit was ok,
but not spectacular. This was a butted-fit with two flat surfaces simply having
to be glued against one another. There was some gapping along the surfaces, plus
a bit of bowing-in. I decided I wanted the parts to have a firmer attachment. To
firm up the fit, I backed up the surfaces inside the nacelles and body with 1/4"
wooden strips to alleviate the gapping and bowing-in and used small nut/bolts to
hold the parts together. I slathered some 30-minute epoxy into the gap - I
wanted a little extra working time here - and then firmed up the nuts on the
bolts until the parts were flush and the epoxy began to smeej out along the
edges. I wiped away any smeejing and then let this set up overnight before
moving on to the body. I completed this assembly by epoxying the aft caps on the
nacelles and the landing thruster modules on the nacelles' keel-side.
Front body & docking module: I tacked these in
place with superglue and then pasted up the joints with epoxy putty (1 hour pot
life; 24-hour set up). No problemo. The rest of assembly was fairly
straightforward for this type of kit.
Main thrusters: After scoring up the mating
surfaces, I epoxied the three main & two smaller thrusters in place. I also
attached the octagonal whatsimagimmies below the main thrusters.
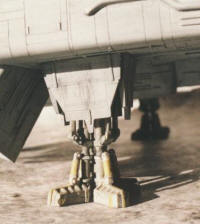
Aside from the landing gear housings (more epoxy), the
rest of the assembly was vinyl-to-styrene joins or styrene-to-styrene. I did V-S
joins with superglue and S-S joins with whatever liquid cement I was using at
the time. That might have been Dr. Scat typewriter cleaner, back in the day when
anyone could walk into an office supply store and buy a bottle of
trichloroethylene. By the quart. Fantastic plastic welder, dirt cheap compared
to Micro-weld or Tenax. Today, ask for Dr. Scat and you'll get a 404 stare from the
Office-fillintheblank drone. (Typewriter? What's
that? Plus I'm sure someone somewhere decided that trichlor causes cancer in
mice who bathe in it daily.)
But first, a bit of pre-painting was in order for the
areas that would be paint-shielded by body flaps and such. I masked over the
areas where there would be V-S joins and airbrushed around the thrusters and the
in-facing surfaces of the body flaps with neutral gray paint fogged over with
dirty grays.
After the paint dried, I removed masking and proceeded
with the V-S joins of the thruster struts, body flaps and other large-ish parts.
I saved all the thin antenna/probes for last. At this point, minus landing gear
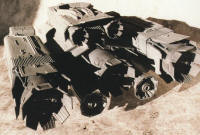
and antennas, I gave it the main paint job - neutral gray airbrushed over all. I
did the thruster exhausts and docking ring with black & some metallics. There
are few dark panels on the body and nacelles. I masked off these and misted
gunship gray as a base. I topped this off with black and dark gray chalks
applied with a cotton swab, then removed the masking. The only weathering on
main body & nacelles areas is a thin wash of black that I let settle in to lines
and along edges. I did some extra weathering around the exhausts - darker grays
/ metallics / chalks in addition to the washes.
I hand-painted the antennas, mostly gray or white as
appropriate, with griming washes. The landing gear are airbrush-painted gray
with a yellow-gray mix hand-painted on the details, then grime-washed overall.
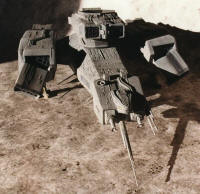
Final assembly was to attach the landing gear and
antenna/probes. I finished up with some additional grime touches, some drippy
streaking on the landing gear hatches, and such.
If I had it do all over...
I'd probably do something about those landing lights. It
would've been fiber optic madness back in the day. Today, I'd probably drill lines
of pinholes and back them with a strip of EL tape. I'd also - and still might
someday - add the Narcissus dock on the underside of the pylon between the body
and port nacelle.