
AMT
Romulan Bird of Prey

Stated scale:
unstated
![]()
![]()
![]()
![]()
![]()
Actual scale:
1/630*

Overall length:
20.8 cm
Material(s):
styrene
Number of parts:
16
Stand included?
yes
Decals included?
yes
My Source:
a friend
Cost (w/o s&h):
0
|
AMT Romulan Bird of Prey |
|
||
|
Stated scale: |
unstated |
|
|
|
Actual scale: |
1/630* |
|
|
|
Overall length: |
20.8 cm |
||
|
Material(s): |
styrene |
||
|
Number of parts: |
16 |
||
|
Stand included? |
yes |
||
|
Decals included? |
yes |
||
|
My Source: |
a friend |
||
|
Cost (w/o s&h): |
0 |
||
*using the oft-cited length of 130m for the full-size article.

I never did get one of these when they were first issued and always kicked myself for it. What can I say - an 8th grader's allowance only went so far in the 60s. So, it was a great gesture when, many years later, a friend who was cleaning out stuff gave me his old build of the bird. Fortunately, it was a tube-glue build, so the kit practically snapped apart. The BOP decal was loose and crumbling as well. I photocopied the remains of the decal, with the intent of painting on the pattern when the time came. With aftermarket decals now available, that's no longer necessary.
Job 1 on this after the clean-up, was to correct the mistakes in the kit's design, including
These are all "after" photos:

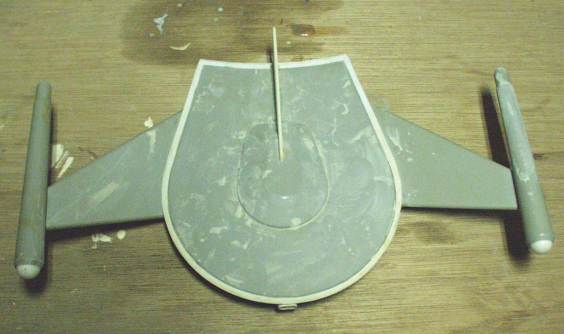
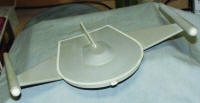
To correct the main hull profile, I needed to extend the top surface of the hull with a ~1/4" rim and add an angled edge around the hull. I first made a template from heavy paper stock tracing the shape of the main hull topside. I constructed another set of lines parallel to the tracing, offset by 1/4". I transferred this pattern to .06" sheet styrene and cut out the rim - this is the white plastic visible in the two photos on the left above. I cut small bracing/support triangles of styrene and glued them around the existing edge of the model, then rested the new rim on top of the triangles and cemented it in place.
For the new angled edge, I first wrapped strips of paper around the hull to get a rough pattern for the shape of the styrene sheet I needed to cut. I cut the new surface from .02" styrene and cemented it to the rim, lower edge, and bracing triangles. Then I trimmed away excess above and below the glue lines and filed/sanded/puttied it up.
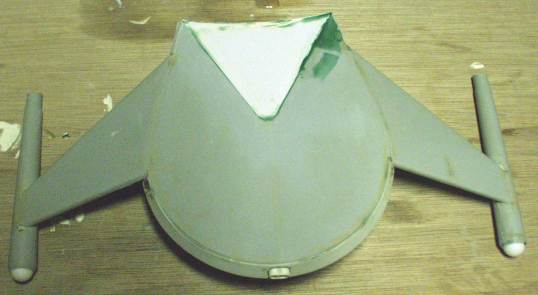
For the keel's concave aft section, I cut out a V-shaped area from the lower hull and cut a replacement piece from .06" sheet styrene. I added some support lips inside the model and glued in the replacement piece. sand..sand..sand...