|

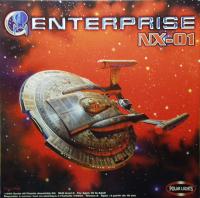
NX-01 Enterprise
Polar Lights
ST Enterprise
Kit Parts
|
 |
|
Stated scale:
|
1/350
|
    
|
|
Actual scale:
|
unverified
|
|
|
Overall length:
|
|
|
Material(s):
|
styrene
|
|
Number of parts:
|
200+
|
|
Stand included?
|
yes
|
|
Decals included?
|
yes
|
|
My Source:
|
Megahobby
|
|
Cost (w/o s&h):
|
US$ 41.95
|

The first of Polar Lights' "big-box" starships is
an impressive piece of work. I knew it would be big, but wasn't quite
prepared for just how big once I was holding those saucer pieces in my
hands.
But... I just wish the details were a bit more crisp and that there
were tighter fit between some of the pieces. More on this as the days
progress... below.
Day 1
Depending on your plans for this kit, you'll want to
assemble the parts in different orders. I plan to paint the exterior before
installing clear parts, so I'm assembling as much of the kit as possible without
installing clear parts. So far, I've joined the fore/aft hull pieces and
installed the saucer rim wall pieces. The walls don't fit in place particularly
securely, and they don't butt up against one another well; there are many gaps
needing puttying. The tabs on two wall pieces cover the holes for the port/stbd
keelside running lights. These tabs need to be removed if you plan to light the
kit.
PLNXday1-1 | PLNXday1-2 | PLNXday1-3
Day 2
If you plan to light this, you'll need to spend some time figuring out your
wiring and where the lights will go. You'll need to mod some of the pieces and
do some drilling.
lower hull obs. dome Lighting access for
this will be covered by the "floor" piece of the aft docking area so you should
cut some wiring/fiber paths before installing the floor.
tab removal close-up As mentioned on Day 1, tabs on
saucer rim parts would cover the lower running light holes. This shows the
removed tabs.
top hull holes You'll need to drill two holes in
the top hull where the parts fit into their depressions. Place the parts in first,
then mark where the hole belongs.

![]()
![]()
![]()
![]()
![]()
