Built back sometime in the 1990s...
 |
Or rather, it used to be a snap. As
always, I made a glued assembly of this kit. Assembly was
straightforward, though I made a number of modifications to the kit to
correct flaws and improve the detailing. Before assembly, I enlarged the
snap-fit holes and shortened the corresponding pins on the parts so
they'd fit properly when glued.
Since the cockpit module supposedly rotates in its armature, I decided to
build this with the cockpit rotated from the view usually seen. |

|
Below the cockpit, I cleaned up and thinned the
edges of the spiky-bits port (guns? antennas? functionless doodads?). I
replaced the kit piece, which was lacking detail and too thick, with
some smaller, thinner spiky bits from the parts box. |
| My next modification was the "intake
ports" (though what they'd take-in in space is anyone's guess). The
area's cowling and kit
piece insert were, again, too thick. I thinned
the cowling and replaced the insert with an assembly made of sheet
styrene pieces.
On the aft side of this area, I cleaned up and
thinned the edges of the engine ports area. Again, (this is becoming the
kit's mantra) TOO THICK. |
| I hollowed out the three small rounded
rectangular inset areas on the leading edge, thinned the plastic and backed up the thinned
areas with small pieces of styrene. |
| I also replaced the flange extending forward in
the darker gray inset area with .06" styrene sheet because the kit's
flange was, well, you know... |
| I thinned the edges of the
cowling around this area before installing the spiky bits piece.
|
| I airbrushed the model overall with
neutral gray, then masked off and airbrushed the darker gray color on
the wings and cockpit module. I don't recall what color I used for the
darker gray. I hand-painted the guns, other spiky bits, and other
details. I used Micro Sol to set the decals
into the detail areas underlying them. I misted over the decals with
thinned neutral gray to tone down the bright orange. I finished the detailing with black & dark gray
(probably gunship gray) washes and chalks. |
| Rather than use the supplied stand, I wanted a
flight display for this. I drilled 1/16" holes in the bulkhead behind
the exhausts and bent a piece of coat hangar wire into a squared-off U
shape so that the wire ends would fit into the drilled holes.
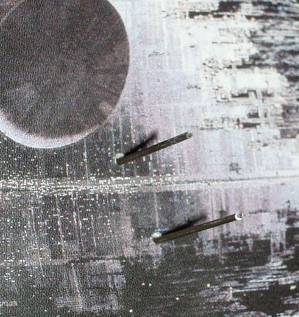
I printed an image from the Death Star battle and
mounted it on foamcore in an 8x10 frame. I inserted the U wire
through holes and secured the wire to the back of the foamcore with
epoxy and duct tape. Finally
I mounted the B-Wing onto the wires. |
 |

![]()
![]()
![]()
![]()
![]()


