|

Cylon Basestar
Howlin' Wolf
Battlestar Galactica
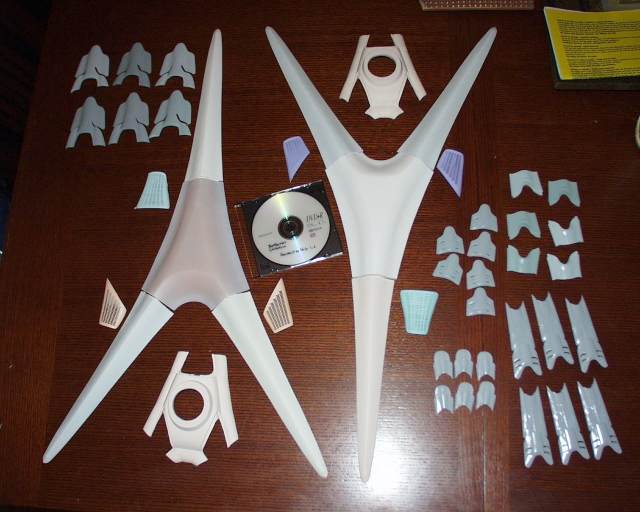
Parts |
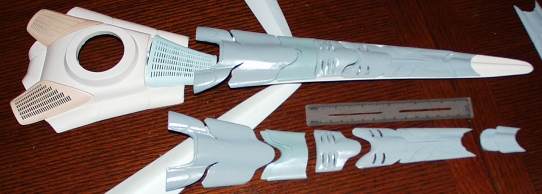
Inner arm parts
|
 |
|
Stated scale:
|
1/2500
|
|
|
Actual scale:
|
unverified
|

|
|
Overall length:
|
29"
|
|
Material(s):
|
resin
|
|
Number of parts:
|
46
|
|
Stand included?
|
yes
|
|
Decals included?
|
none needed
|
|
My Source:
|
Federation Models
|
|
Cost (w/o s&h):
|
US$250
|

November 2007
The hype for Razor got me going on this one, I guess.
The kit's instructions include 2 Zoic images of the Basestar - a good start for
assembly references, but not quite enough. I found more images at
Battlestar -Wiki in the
Ships
Portal. And, my oh my...
here
at Modelers Miniatures and Magic.
In looking over the parts and the multi-color resins used, a wacky observation came to mind...
In the original Galactica premiere, during the attack at Carrilon, Starbuck asked about bringing in
purple and orange squadrons. Well, I guess
with these launch bays, the Cylons have taken that to heart and gone one
better.
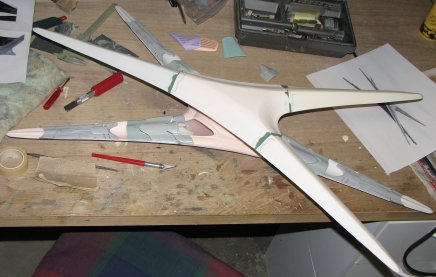
After a good scrubbing to remove mold releases I began
assembly by the book, attaching the arms to the core for each half of the ship.
It took some trial and error to find the best match between arms and cores. The
instructions suggest that the parts are marked to show which arm attaches where,
but there were no such markings evident. I
marked the best-fits before moving on to assembly.
| I laid out the hull core
and arms on a gridded cutting mat to make sure
they lined up as straight as possible. If you want registration pins or other
helpful assembly features, this is not the model you're looking for. The parts
have to be simply butted up against each other and super-glued. I used wooden
shims to work around a few odd twists in some of the parts. I applied super glue
across the seam and let the assembly set up overnight. In retrospect, this step could be best saved for later,
after some of the inner-arm parts had been added. The assembled core & arms is
really unwieldy on a model this size. Or maybe I just need a larger workbench. |
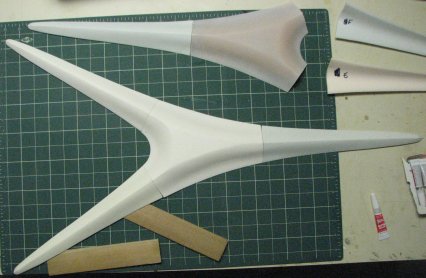 |
| The kit includes styrene
strips to reinforce the arm-to-core joins. I opted for 1/16" wire and
epoxy instead. I engraved three grooves using a Dremel tool and
superglued a 2" to 3" long wire segment in each groove. After they had set
up, I applied epoxy putty over the wires.
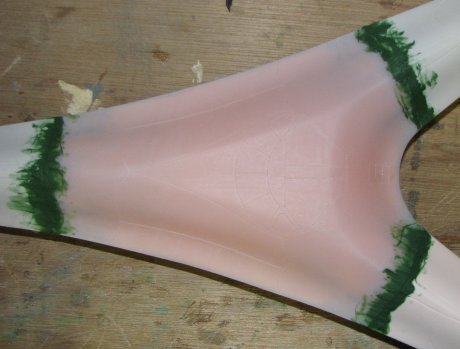
Once the epoxy had set, I applied green putty over the outside seam. |

|
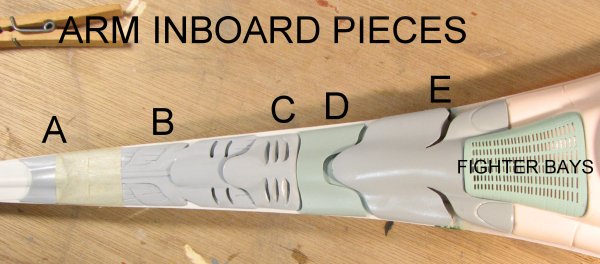
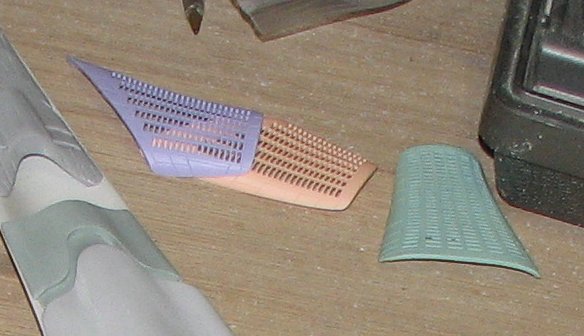
I began test fitting the inner arm parts (above) and quickly came
to the realization that another change to the assembly instructions was called
for. The instructions call for the 5 arm inboard pieces, A-E, to be laid in starting
at the outer end. With no means to ensure the arm parts were going in with the correct
spacing (registration pins? marks? notches? anywhere? nope), I couldn't be sure the core piece
would fit in when all arm parts were placed. So, I attached the core parts
first.
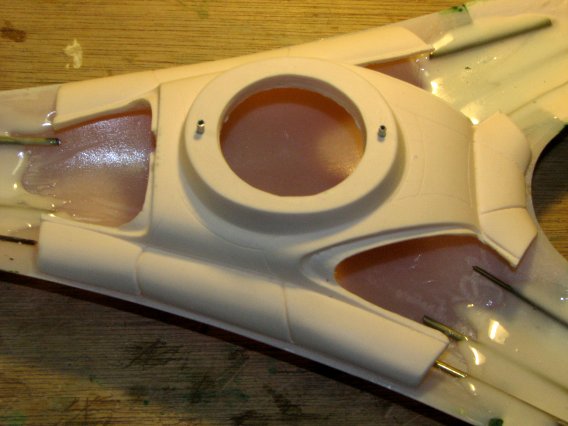
I drilled out holes in the central ring and added 1/16"
aluminum pegs. These fit into matching holes in the other half. Yes, its...
registration pins!!
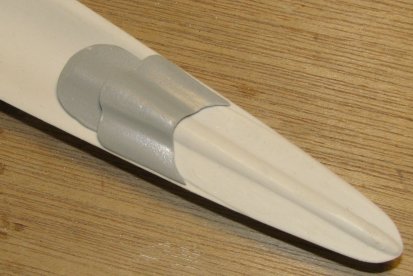
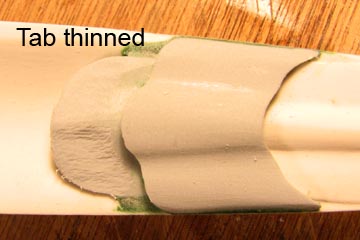
| Part A fit in without question of placement, butting against the
detail inside the end of the arm. When I
test-fitted Part B in place, the two end points would not fit flush against
the rims of the arm. it was evident that the tab on Part A and some of
the inside surface of Part B would have to go.
After some Dremel work, I had a satisfactory fit
between Part B and the arm.
The gaps at the side of Part A's tab also needed
puttying.
|
 |
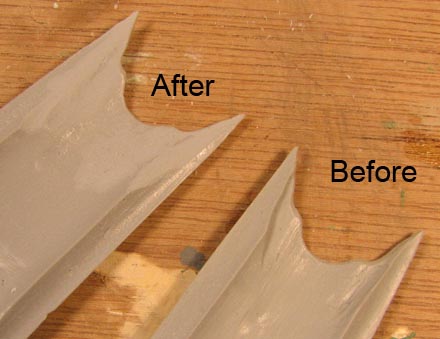
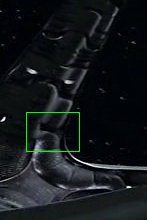
| At this point I moved to the core-end of the arm and Parts
E and D. Part E has to butt against the core, and the fighter bay faces have to
fit in. And... damn my eyes!... I noticed that the bent
V-ish notches in Part E were
the wrong shape, as the clip (at far right) from
this image shows. Out with the razor saw, Dremel, and green putty...
There also should be a significant amount of detail
inside that notch. That will have to be scratchbuilt.
And here I thought I might be able to make this "A Model in a Month." |

|
 |
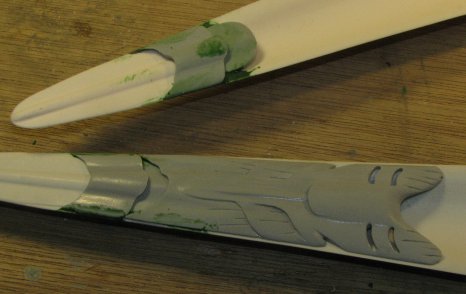
12/22/07 - Modification of the "E" parts
continues. And Parts C will need several mods as well: The "shark gill" areas
need to extend to the edge of the arm. Also the parts need to be trimmed to fit
into the area between the B and D parts.