Flash
|
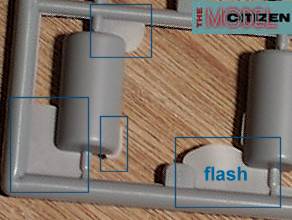
The easiest defect to notice is flash on the parts and/or the sprues.
Flash happens then the two halves of the mold don't join perfectly. Then, when the styrene
is injected, some of it oozes into the gap between mold halves. A small amount of flash
isn't a big problem, but if you see a lot (as in this image) then you might expect there
to be some fit problems when you assemble the parts. Since there's enough room in the mold
for flash to form, then there's likely some extra plastic on the parts too. If you find
"flashy" parts, mark them so that you can pay extra attention to their fit
during assembly. (from the "Area S4 UFO" kit) |
Sinks
|
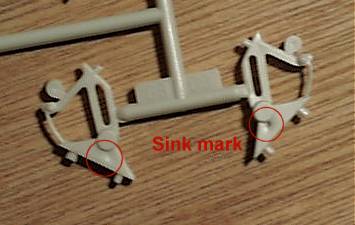
Sinks are another common defect in styrene kits. You'll typically find these on
thicker areas of kit parts. The plastic contracts as it cools in the mold, leaving a small
sunken pit in the part. A lack of sinks is an earmark of quality in a kit. Later, you'll fill in the sinks with filler putty. For now, just note where they are. (from AMT/ERTL's Episode 1 Droid & STAP) |
|
Ejector Pin Marks
|
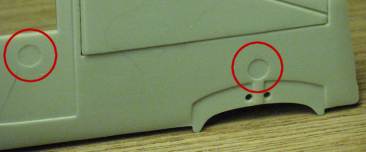
After a sprue has been molded, small pins embedded in the
mold pop the piece out. In most case, the pin marks will be on inside
surfaces of the parts or someplace where it won't be seen after
construction. The pin mark on the right won't be hidden, so it needs to be filled - although it is clean enough that it could be left as "detail." (from AMT/ERTL's Episode 1 Droid & STAP) |
Incomplete Molding
|
It's rare that you'll find a defect like this - not enough plastic made it
into the mold, resulting in incompletely-formed parts. Notice the "whiskers" of
instrument panels along the edge of this cockpit tub. (from Hasegawa's 1/72 F-4 Phantom) |
|
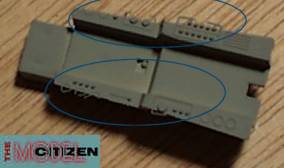
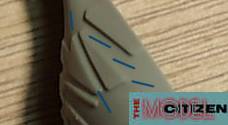
Draft Angle Errors These aren't so much molding defects as they are a manufacturing shortcut. Notice how the marked edges of these panels slope - there's no crisp edge. In order to be able to get the parts out of a two-piece mold, the edge slopes. If it were a crisp edge, it would catch on the mold when popped out. A better manufacturer would have used a 3-piece mold on these parts, or made more parts for the kit. This can sometimes be fixed by filing a crisp edge along the panel. |
|
|
(from AMT/ERTL's STMP & ST6 Klingon Cruiser) You'll see similar problems with the secondary hull aft deflector grid lines on Monogram's USS Voyager kit, except these can't be fixed by filing. |
|
|
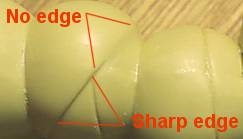
This is a particularly-glaring example of draft error. The back of Robby's leg (bottom) has a sharp edge, but this edge is lost on the front part of the leg. |
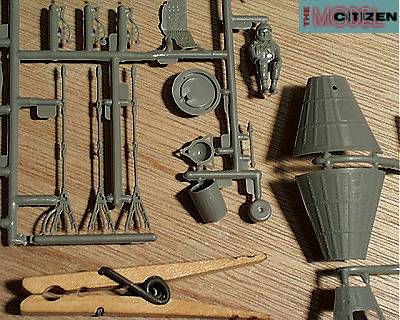
So, what does a good molding job looking like? Well, try Revell's 1/48 Mercury / Gemini kit.
 |
|
|
|
|
|
|
The Model Citizen's "Sprue U" pages are �2000-2004 Roger Sorensen
last updated 04 December, 2007