If you don't get a good "smeej" when you cement your kit parts together, you'll end up with a gap of some sort between the parts. These gaps will need to be filled. There are several methods you can use to fill the gaps. In most cases, putty is the way to go, but there are others to use in certain cases. Let's look at puttying seams first.
 |
The tools & materials you'll need for this are:
|
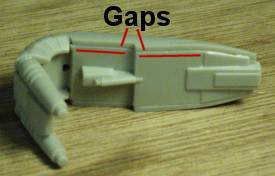
| Below are two typical gaps in assembled
parts. Left: Even though most of the seam cleaned up well, the very end (red circle) has a gap where one part extends out past the other. Right: Here there is simply a gap between two parts; they don't fit closely together. |
|
|
|
|
|
|
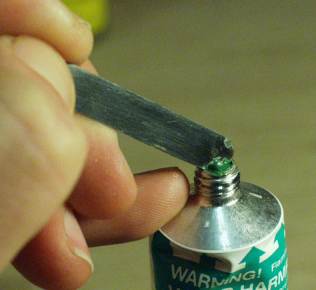
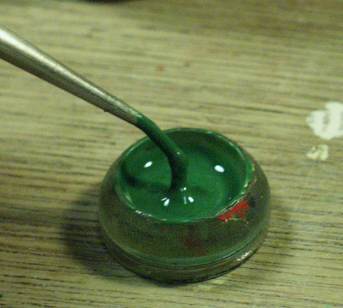
Begin by scooping a small bead of putty from the tube. |
|
|
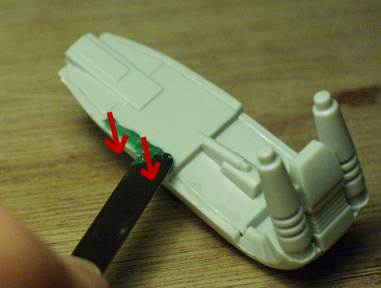
Apply it in an across-the-gap motion, pressing putty down into the gap as you pull the spatula across it. Use the edge of the spatula to scrape up excess putty as you move along the gap. |
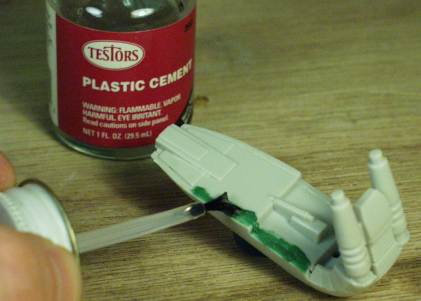 |
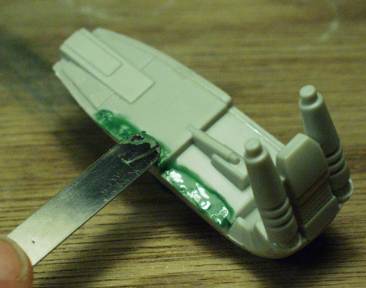
Once puttied, the seam will probably look pretty rough. Apply a small amount of Testor's liquid cement to the putty along the gap. |
|
|
Then use your spatula to work the cement into the putty and smooth it. |
|
|
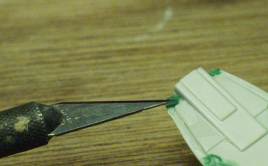
For small gap areas, use the probe or knife tip to apply the putty. |
|
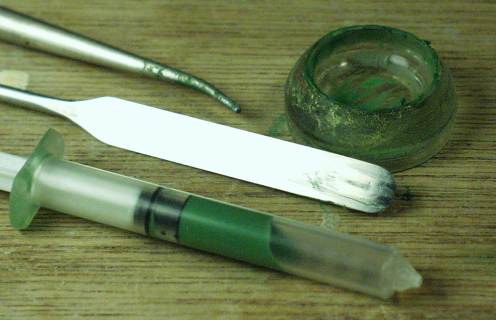
In some cases, a syringe is the best way to apply putty to a model. The syringe is useful for filling ejector pin marks, running a long bead of putty along a lengthy gap, or getting putty into a close space where it may be difficult to fit other puttying tools.
|
|
|
|
For use in a syringe, putty needs to be thinned. I thin about 4-5 parts putty with 1 part Testor's liquid cement, just enough to make the putty squeezable through the syringe opening. |
|
|
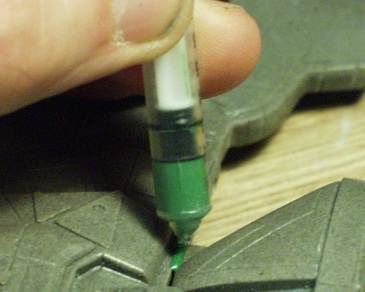
Scoop the putty into the syringe. In this case, I've heated & drawn out the syringe tip to make a smaller hole, for a thinner bead of putty. |
|
|
Place the syringe tip at the gap & apply gentle pressure to the plunger and you move the syringe along the gap. |
Once your seams are puttied, let them dry for a couple days to a week before sanding. The putty will shrink slightly as the solvents evaporate so if you sand the putty too soon, you could end up with small cracks in the putty once it's fully dried out. Keep in mind that the more you thin the putty, the more it will shrink. To see if putty is ready to sand, I give it the "sniff test" - if the putty no longer smells of solvents, then it's ready for sanding.
|
|
|
|
|
The Model Citizen's "Sprue U" pages are �2000 Roger Sorensen
last updated 04 December, 2007