After your assemblies have set up, it's time to make those seams disappear. If the parts had good alignment and you were able to get a good smeej when you cemented them, they'll vanish easily. Seams along mis-aligned parts or seams with gaps or pits will take extra work.
For seam finishing, you'll need the following items at hand:
If some seams on a styrene kit are in really bad shape, you'll also need
Finishing a seam basically involves three steps: filing, filling, and sanding. For the rough finish work on the seam, use your file set. Each shape of file will work better for some finishing task that it will for others. The workhorse is the round or "rat-tail" file. The round shape means it won't catch and dig into your plastic. Use this file for general seam work.
|
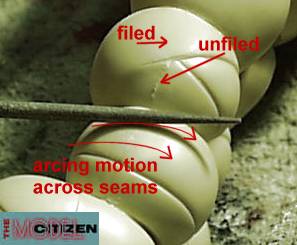
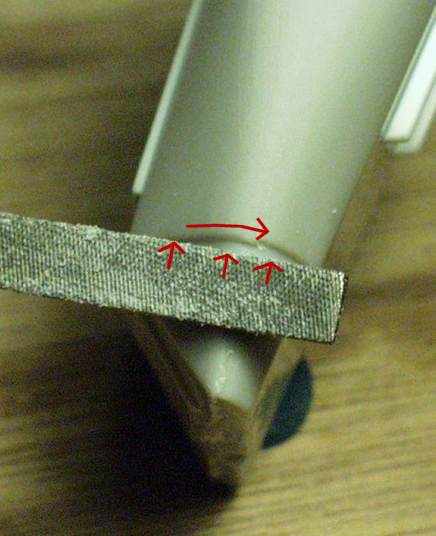
Using an arcing motion, push the file across the seam. Try to make your
strokes conform to the surface. For example, in the picture of Robby's legs, the surface
is basically a sphere. In this case, rock the file as you move it across the seam,
so that the filed surface of the seam doesn't become a flat spot. Compare the appearance
of the filed surface to the unfiled one. Note also the beginnings of a fix on the draft error in between the two upper arrows. More about this later. |
|
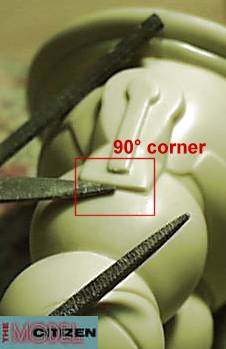
Your round file will work for most parts of a seam, but obviously, it
won't fit into corners. Use your rectangular or square file on the parts of the seam where there are 90-degree angles. Press the corner of the file into the corner of the angle and push it across the seam. Try to limit your filing to the seam itself. In a case such as this one, avoid pushing the file beyond the raised area -- you'll run the risk of digging the file into the surface of the sphere. |
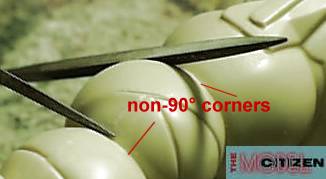 |
For non-90-degree angles, use a wedge, semi-round, or triangular file. If the angle is less than 90 degrees, use a narrower file -- wedge or semi-round -- on the seam. For wider angles, use your triangular file. |
|
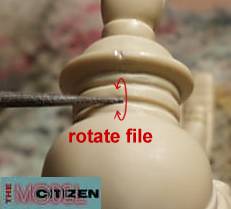
For channels in the plastic, I'll use either a round or square file,
depending on whether the channel is rounded or squared off. For a rounded channel, you may
be able to fit the file through it if the channel's wide enough. For a small channel, just
place the tip of your round file in the channel and rotate it. For squared-off channels, use your square file. They usually taper toward the tip, so you should be able to find a section of file with the right width for the channel. For really narrow channels, tiny jewelers' files will work, or you can clean them out by scraping with your hobby knife. Another approach is to fold a piece of sandpaper over your knife's blade and sand across the channel. |
|
Now, for that draft-error a few pictures back. This is easier to do when the sloped edge isn't also a compound curve, but the technique is the same. It may help to draw a pencil line to guide where you need to file. Using a square or rectangular file (this one tapers toward the tip), start with the edge of the file at the start of the draft error and press the edge into the plastic. Work along the draft error in short segments. |
|
|
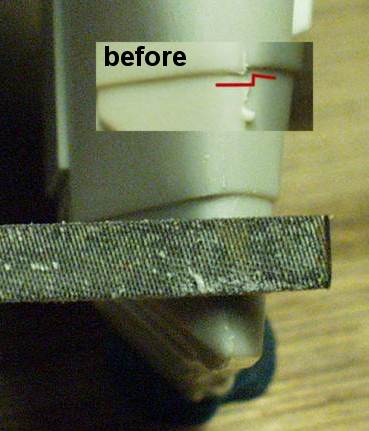
Here, the problem wasn't a draft error, but rather that the parts had a slight offset when they went together. The easiest fix here is to file the left side of the offset back so it matches the right side. |
|
|
Work the rectangular file across the offset from left to
right, in this case, since the left side is side being filed back.
Press the file up against the offset, since that's the plastic you're trying to remove. Don't press the file again the plastic under the large flat side of the file or you'll end up with a flat spot on this curved surface. |
|
|
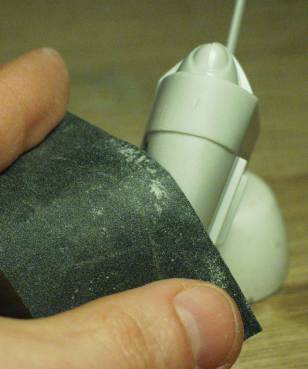
Amazingly, this part (the droid backpack for the ERTL/AMT
battledroid/STAP kit) only required sanding to finish the seams. In most cases, holding the sandpaper stretched & held by 4 fingers works for sanding curved edges. In the picture, the index & middle finger hold one end of the sandpaper; thumb and ring finger hold the other. Note: this piece was wet-sanded, even though the pictures were taken "dry." |
|
|
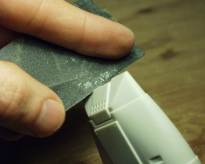
The folded edge of the sandpaper was used to clean out the grooves in the piece/ |
|
|
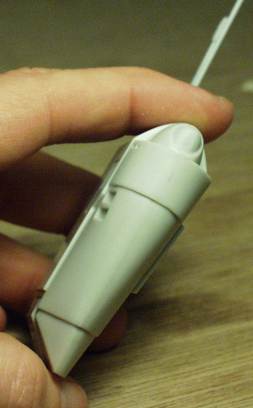
The end result on the backpack piece, using only filing and wet-sanding on the piece. You can see where the seams were from the slight color variation along them. This piece will not need any putty. But you won't always be so lucky, as I found out when I moved on to the battledroid's head. |
|
|
|
|
|
The Model Citizen's "Sprue U" pages are �2000 Roger Sorensen
last updated 04 December, 2007