![]()
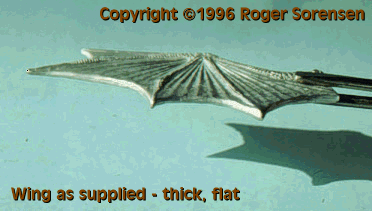
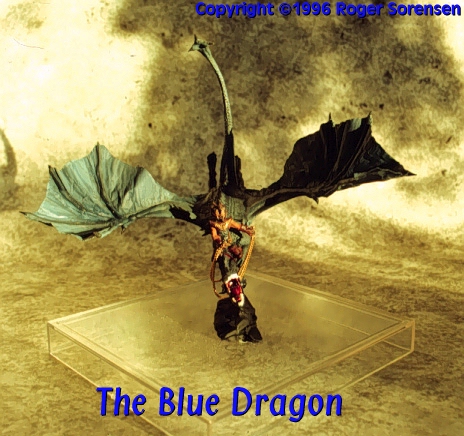
Before...I'd pity the dragon who had to fly with a wing this thick. Unfortunately, most manufacturers of metal figures produce wings with little more realism. The steps below outline the process I used to remake the wings for my Blue Dragon, one of the dragons from Ral Partha's "Dueling Dragons" set. |
 |
Tools & materials needed...You'll need a scroll saw (hand or electric), metal files, aluminum foil, rubber cement
spray, padded forceps (e.g. wrap a few layers of tape around each forceps tip), soldering
iron (preferably with variable heat control), scissors or hobby knife, tape, &
toothpicks (flat, rounded-end kind). If you use a hand saw, a vise would be helpful to
hold the pieces steady. Warning! Don't do anything stupid! If you don't know what "stupid" means, stop right here.
|
|
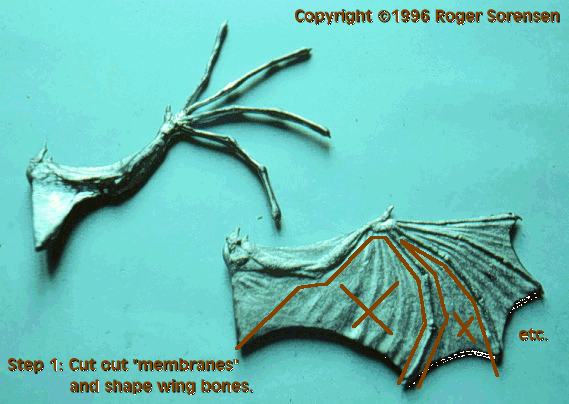
Step 1...With the saw, carefully cut out the wing membrane areas between the phalanges. Two of
these areas are marked with a big brown X in the photo. Smooth and shape the phalanges
with metal files. Once separated, you can CAREFULLY reposition them. AVOID bending them
too often -- you'll fatigue the metal. If you do manage to break one off, re-attach it
with a cyanoacrylate glue. |
 |
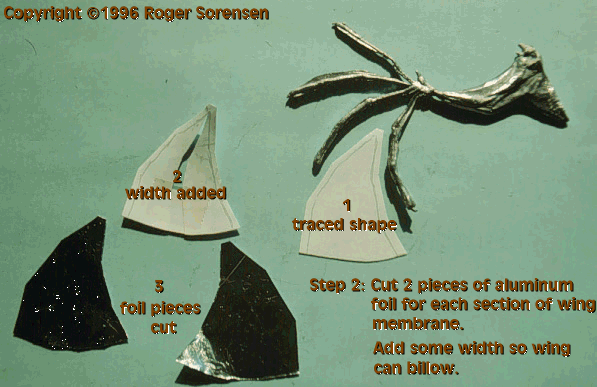
Step 2...Lay the wing skeleton on paper and trace the shape each membrane segment. Draw a border
equivalent to the diameter of the phalange. Cut out each wedge. In order to give the wing
some "billow", you need to widen the wedge: cut most of the way down its middle,
spread it apart and tape it. |
 |
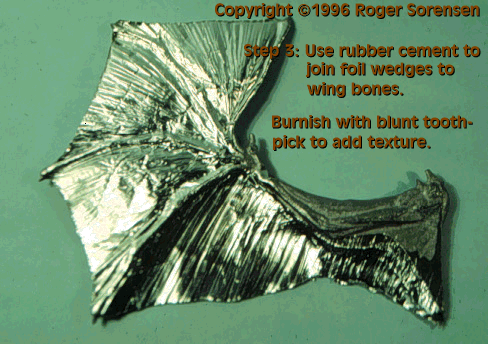
Step 3...Working with one membrane segment at a time, apply rubber cement to one side of the
aluminum wedges. Carefully join the matching wedges, being careful that the edges that are
to join to the phalanges line up, but stay open. You should have a 'Y'-shaped edge that
will wrap onto the top and bottom of the wing. |
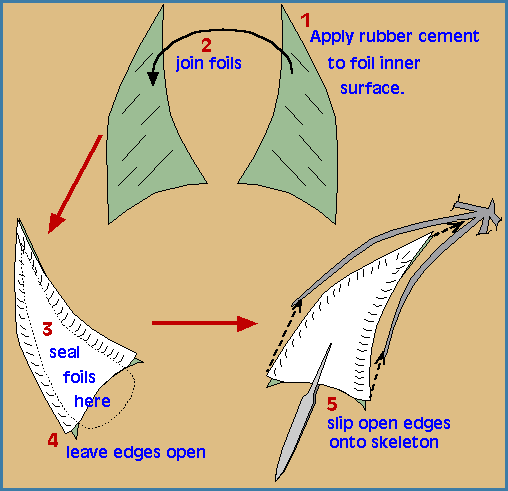 |
Step 4...Once the membrane is in place, use the toothpick as a burnishing tool to seal the foil
edges. Clean up any torn foil edges and make sure there are no gaps or tears. |
 |
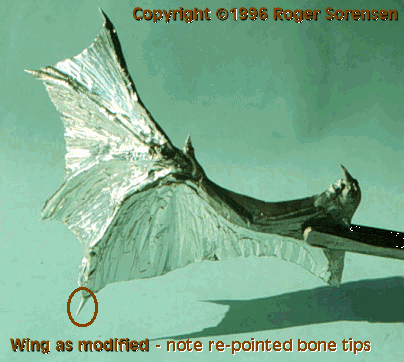
After...As a final touch, I used a soldering iron to carefully melt and re-point the wing claws. If you want to try this, first practice on some of the metal fragments from step one. Hold the iron to the claw just until it melts, then pull the iron away. This will draw the melted metal out to a point. You can now do your final positioning of the phalanges and shape the membranes. |
 |
|
|
|
|
|