|

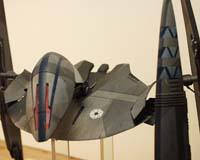
Vulture Droid in Walk-Mode
scratchy-bashy conversion
of the Estes Droid Starfighter
|
 |
|
Stated scale:
|
none
|
 
|
|
Actual scale:
|
1/16
|

Vulture Droid Gallery
|
|
Overall length:
|
9.5"
|
|
Material(s):
|
ABS & scratch
|
|
Number of parts:
|
1 initially
|
|
Stand included?
|
yes
|
|
Decals included?
|
no
|
|
My Source:
|
KayBee Toy
|
|
Cost (w/o s&h):
|
US$5 clearanced
|

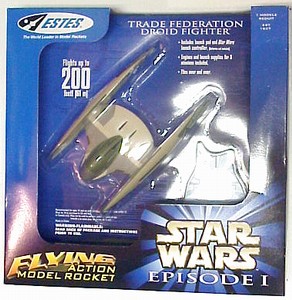
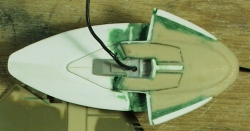
 Estes released several model rocket adaptations of spaceships from Star Wars
Episode 1. Among them was a droid starfighter in attack mode. I picked them up
on clearance at a KayBee toy store and put them on my “someday” pile, intending
to rework them into models from the movie. This is a rebuild of the fighter into
the vulture droid of Episode 3. I began by assembling references. The main
reference is the Incredible Cross Sections book from Episode 1. Frame-grabs from
Episode 1 and Episode 3 provided additional reference material.
Estes released several model rocket adaptations of spaceships from Star Wars
Episode 1. Among them was a droid starfighter in attack mode. I picked them up
on clearance at a KayBee toy store and put them on my “someday” pile, intending
to rework them into models from the movie. This is a rebuild of the fighter into
the vulture droid of Episode 3. I began by assembling references. The main
reference is the Incredible Cross Sections book from Episode 1. Frame-grabs from
Episode 1 and Episode 3 provided additional reference material.
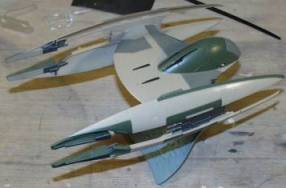
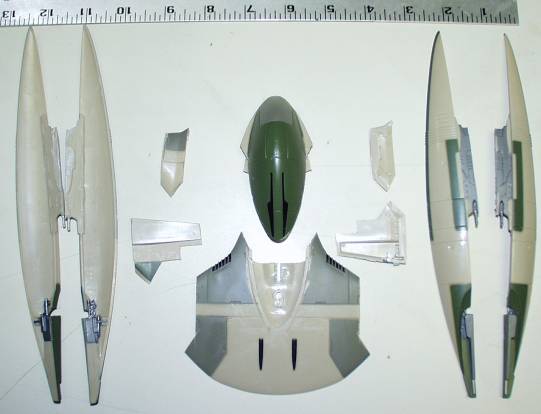
To
begin the conversion I had to dismember the droid fighter. Using a razor saw
(both large and X-acto tool size), I
cut away the four wing / leg pieces and the “head,” then trimmed away the four
body panels which, when closed, cover the leg struts. I used Dremel tools,
files, and sandpaper to clean excess material away from the inside surfaces of
the four panels and to open the “eyes.”
Nosejob
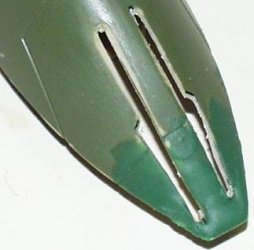
I had to reshape the nose on the droid head, since
it was more rounded than it should be. Sheet styrene and
thinned green putty accomplished that. After the putty
dried, I sanded it down to shape. I painted the interior of the head black to
reduce light bleed-through from the LEDs that would be installed.
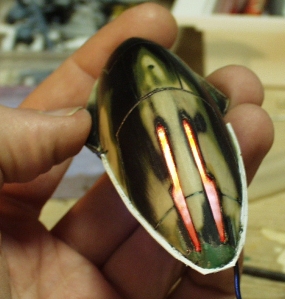
Eye Lights
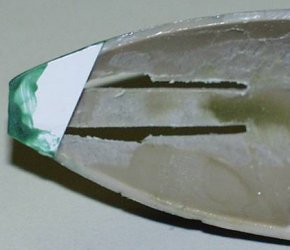
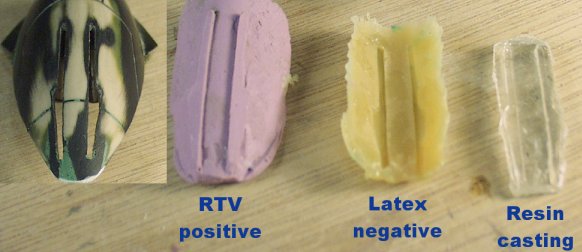
The eyes are clear resin castings. I pressed fast-set RTV
putty into the inside of the head to obtain an RTV positive. I coated this with
liquid latex for a negative mold which I filled with clear polyester resin to
obtain the final eyepiece. This piece was trimmed and pressed in place to fill
the eye openings in the head.
I painted the eye piece with a mix of Tamiya
transparent red with a bit of Acryl pearl white. I then scored the casting
slightly to let more light through for the brighter forward area.
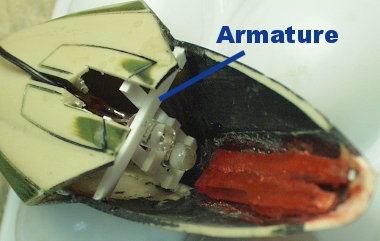
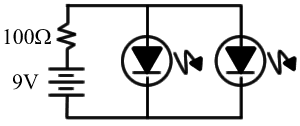
Two white LEDS (wired in parallel, with a 100-Ohm resistor in series) inside
the head illuminate the eyes and are powered by 3 lithium coin batteries in
series (9 volts). The 'white' LEDs have a distinct blue tint,
so I painted them with a light coat of transparent yellow to rebalance
the color. The wire leading out of the head will go to the batteries. I put
together a small armature out of strip styrene to fit inside the head and hold
the LEDs in position.
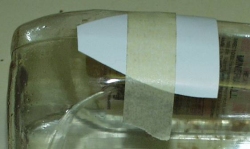
| I covered the bottom of the head with sheet styrene formed to a compound
curve, made by stretching heated sheet over a suitably-shaped bottle. I added
sheet pieces and parts box pieces to detail out the area where the neck struts
attach. I used strip styrene to build out the side-aft flanges so they have the
correct rounded contour, drilled out the inside of the flange and install small
bits of 1/16” aluminum tubing for the detail piece.
|
 |
|
 |