After you've prepped the parts, you're ready to start on assembly. You should begin with the sub-assemblies: those sets of parts which later will be combined during main or final assembly. A sub-assembly might be an aircraft wing, a cockpit, or a warp nacelle. Make sure you've got the correct parts for the sub-assembly you're working on. You may want to set out a number of sets of parts and run an assembly line.
For assembly, you'll need the following items at hand:
If you're new to using liquid cements, you should practice on scrap plastic or a junky kit. Liquid can be a bit tricky to use, but the results are well worth it. Above all, be patient. Pop some good music on the stereo and let your hobby be relaxing, not stressful. You'll soon discover Zen and the Art of Kit Building. I tend to choose music that goes with the kit I'm working on. These images show assembly of the big main guns of the Battle Droid & STAP from The Phantom Menace, so guess what music's playing?
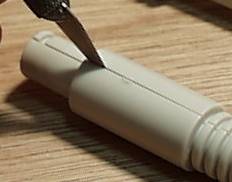 |
Place the parts together, leaving a gap about the width of a knife blade. This is the easy part. It's also a good use for those old, dull blades. |
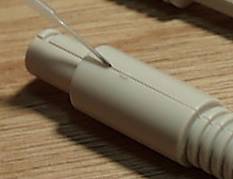 |
Place the loaded cement dropper tip (in this case, it contains Tenax
7R) on
the gap and let capillary action draw it along the seam. You may need
to gently squeeze the dropper to get it started. Let cement spread along about an inch
of the seam, then move the dropper along and repeat the process. Repeat as necessary until
the seam is fully cemented. If the parts you're assembling are open on one side, or have openings that let you get your dropper inside the kit, then you can apply the cement along what will be the inside of the kit. You don't run as much risk of cement running along the model surface. Just be sure to keep your fingers away from the seam as it fills with cement. |
| If the cement overflows the seam, you're squeezing your
dropper too hard. To deal with an overflow, just let the cement evaporate, or roll the
part around so that the excess cement flows into a seam. Don't wipe or touch the area
where the cement overran the surface - you'll just embed rag fibers or mold a fingerprint
in the plastic. If possible, set the part aside until the overrun dries. Later, you'll
need to sand it down. If you're in the midst of cementing it, handle it carefully. After
all, fingerprints don't make good superdetailing. Also, be sure that you're not shooting a lot of excess cement inside the kit parts. Remember, this cement is a plastic solvent. Excess cement trapped inside parts will dissolve its way through the plastic. This can soften and distort the plastic. |
|
|
|
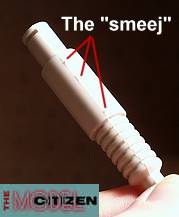
Press the parts completely together and clamp with clothespins or
whatever's appropriate for the size & shape of the parts. You'll probably see some
softened plastic "smeej" out of the seam. This is a good thing. It
resembles the bead along the seam of welded metal. Also, when you file off
the smeejed-out plastic, it's unlikely that you'll have to use filler
putty to clean up the seam. Leave the parts clamped together for several minutes, if the parts fit well. If they fit poorly because of warping or mis-alignment you can leave the clamps on overnight to ensure that the parts will stay in place once unclamped. |
So, Dr. Science, what's happening here? When the cement hits the gap, it begins to soften and slightly dissolve the plastic. Now, the plastic is a polymer of styrene - hence the name, polystyrene. Think of the styrenes as beads on a necklace and the necklace as the polystyrene chain. The cement lets the polymer chains start to float around, but it doesn't break them apart. By the time you've applied the cement all around the seam, the plastic at the seam is slightly squishy. Think of it as a tub full of water filled with necklaces. If your stir it around and then remove the water, you'll have a tangle of necklaces.
Now, when you press semi-dissolved edges of the kit parts together, the polystyrene chains tangle together. When the cement evaporates, you end up with a seam of knotted & tangled polystyrene. The bond between the cemented parts is about as strong as the plastic itself.
|
|
|
|
|
The Model Citizen's "Sprue U" pages are �2000 Roger Sorensen
page URL: http://employees.csbsju.edu/rsorensen/modelcitizen/sprue_u/130.htm
last updated 04 December, 2007