Now, you're ready to start getting parts ready for assembly. The worst thing you can do now is start ripping and twisting your parts off the sprues. Instead, carefully cut them away - it's easier to sand down a nub than it is to putty a gouge. Ripping parts off the sprues is a good way to make gouges in the parts, because chances are, some of the plastic from the parts will stay with its attachment point on the sprue.
 |
 |
| Using a model knife with #16 blade or side-cut nippers, cut each part away from the sprue. Leave a short nub, which you'll later file off. You'll be less-likely to lose parts if you only cut them away as needed. | |
If the parts have any flash connecting them to the sprue, slice through the flash with your knife. Later, you can file and sand down excess flash.
As noted earlier, if you cut away a number of nearly identical parts, number them with a pencil or marker. It'll help if you have a parts tray on hand to hold your smaller prepped parts. Plastic microwave dinner trays or sectioned picnic plates work well for this.
 |
As you remove the parts and prep them for assembly, you can begin to test-fit them. Fit the parts together and check for possible fit problems - gaps, mis-alignments, or warped parts. You can solve a lot of fit problems by examining why the problem exists. Can filing down a part improve the fit? Are the registration pins mis-aligning the parts? If so, you can cut off the offending pin(s) or drill out the reg-pin hole. |
If a part is so badly-warped that it won't fit together with other parts, heat it with a hair dryer until it's pliable enough to reshape. Dry-fit the heated part to another part of the kit, wrap them in rubber bands and let them cool.
Finally, check over the parts for any outside surface imperfections or rough spots. File or sand down problem areas, paying attention to the points where the parts were attached to the sprue and any parts with a lot of flash. You may need to file down these areas to get a good fit. Just make sure you don't file off any of the detail that belongs on the part.
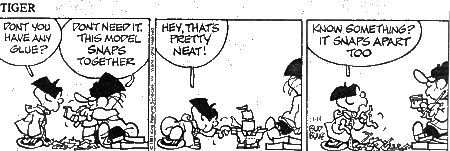
With the increasing number of snap-together kits (a.k.a. "snap-apart" kits) in recent years, another area that's become problematic are the registration pins & holes on kits. They're less of a problem if you're doing a "snap" assembly, but for cemented assembly you'll need to do some extra prep. In the past we only had to worry about whether the parts would line up. With snap-fit parts, we also need to worry about whether the parts will fit completely together. Often, the registration holes on snap-kits are too small for the pins to fit in entirely, since the manufacturer is after a compression fit. Since I always do cemented assembly, when I'm prepping snap-kits I'll use an X-acto to bore out the registration holes so that the pin will easily fit in.

If it looks like assembly of the kit will make a molding defect difficult to get to later, then now is a the time to take care of those problems. For sinks and draft errors, see the chapters on Seam Finishing. Sinks need to be filled with putty and sanded. Draft errors can usually be fixed by filing if the error is in a raised area, such as the image of the plating on the Klingon ship. If the draft error is in what should be an engraved area, such as a grid line, then the area may need to be filled and re-engraved. An example of this type of draft error can be seen in the deflector grid lines flanking the hangar bay on Monogram's U.S.S. Voyager. Instead of being neatly-engraved, thin lines, the grid is a wide, v-shaped trench.
The first thing to do to the parts of a resin kit is to give them a good, strong scrubby cleaning. The surface of the parts will have picked up mold-release agent from the inside of the molds when they were cast. They will probably have a waxy, slippery feel to them when you take them out of the box due to the release agent. The agent is necessary in the casting process to ease removal of the parts from their mold and to extend mold life. However, the agent will interfere with adhesion of glues, putties, and paint to the model.
Use a scouring cleanser and thoroughly scrub the parts' surfaces. Rinse well and let the parts dry thoroughly before continuing.
Now, get out the magnifiers and check the parts for casting artifacts and defects, as described in the previous section.
 |
Most resin parts will have a small stub of resin left on them from the channel used to pour resin into the mold. Begin the clean-up by removing these "pour stubs." A pair of side-cut nippers works well for this. If the stub is large, start at one edge and nibble your way through it. |
|
|
|
|
|
The Model Citizen's "Sprue U" pages are �2000 Roger Sorensen
last updated 04 December, 2007